How to Create an Invoice and View the Details
This article shows you how to find an invoice (bill), open it to see every detail, and decide what to do with it. It also explains how to download invoices as PDF files.
Invoices are not created in the admin platform. They are sent to you by internal subcontractors (workers who invoice you at an hourly rate). Once a worker sends an invoice, it appears on the Bills page for you to review. See What Are Bills and How They Work.
Step 1: Open the Bills page
In the left-hand menu, go to Finance and click Bills.
On this page, invoices and bills mean the same thing. Some labels, such as Invoice Number, still use the word "invoice".
Step 2: Find the invoice
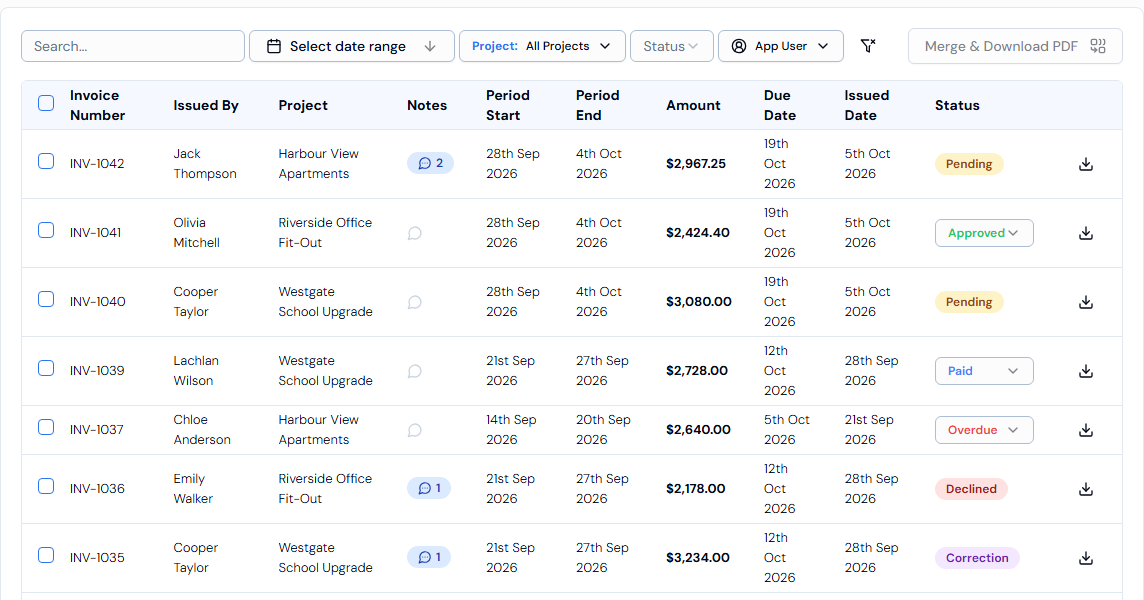
Use the tools above the list to narrow it down:
| Filter | How to use it |
|---|---|
| Search... | Type an invoice number. |
| Select date range | Pick a start date and an end date on the calendar. |
| Project: | Pick one project, or All Projects. |
| Status | Show only invoices with one status, for example Pending. |
| App User | Tick one or more workers to see only their invoices. |
| Clear Filters | The funnel icon with a cross. Removes all filters. |
The list shows these columns:
| Column | What it shows |
|---|---|
| Invoice Number | The invoice's reference number. |
| Issued By | The worker who sent the invoice. |
| Project | The project the invoice is for. |
| Notes | A speech-bubble badge if the invoice has a note. |
| Period Start / Period End | The dates of the work being billed. |
| Amount | The total amount, including GST if charged. |
| Due Date | When the invoice should be paid. |
| Issued Date | When the worker sent the invoice. |
| Status | Where the invoice is up to, for example Pending or Paid. |
Use Rows per page (25, 50 or 100) and the Previous / Next buttons to move through long lists.
Step 3: Open the invoice details
Click anywhere on the invoice row. A panel slides up from the bottom of the screen with the full details.
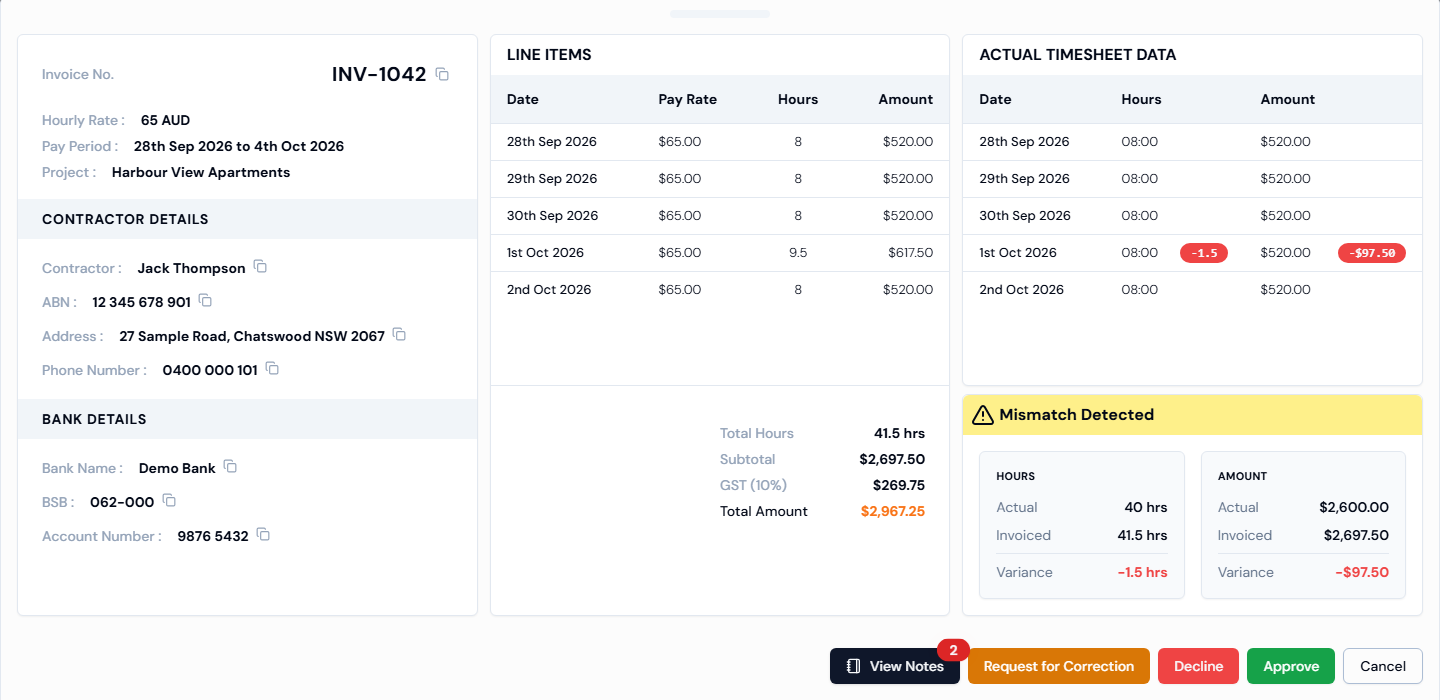
Top of the panel
| Detail | What it shows |
|---|---|
| Invoice No. | The invoice number. |
| Hourly Rate | The worker's hourly rate (in AUD). |
| Pay Period | The start and end dates of the work. |
| Project | The project the invoice is for. |
Contractor Details: Contractor, ABN, Address and Phone Number.
Bank Details: Bank Name, BSB and Account Number.
Click the small copy icon next to a detail (such as the BSB or account number) to copy it. This saves typing when you make the payment in your banking system.
Line items: a table with one row per day, showing Date, Pay Rate, Hours and Amount. Under the table you'll see Total Hours, Subtotal, GST (10%) (only shown when the invoice includes GST) and Total Amount.
Timesheet check: on the right, SwiftCheckin compares the invoice with the worker's real timesheets and shows any differences. See Invoice Anomaly Detection and How It Works.
Step 4: Approve, decline or request a correction
These buttons appear at the bottom of the panel only when the invoice is Pending.
To approve:
- Click Approve.
- In the Approve Invoice window, click Approve again to confirm.
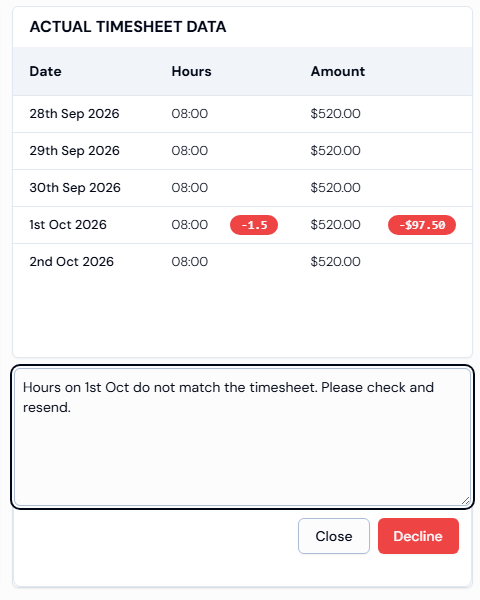
To decline:
- Click Decline.
- Type the reason in the Enter reason box.
- Click Decline.
To ask the worker to fix it:
- Click Request for Correction.
- Type what needs fixing in the Enter reason box.
- Click Submit.
The Decline and Submit buttons stay greyed out until you type a reason. Click Close to go back without making a change. Click Cancel to close the panel.
Step 5: Read the notes
Click View Notes at the bottom of the panel. A number on the button shows how many notes there are. Notes added while the invoice was being reviewed are listed with the author's name and the date. If there are none, you will see No notes available.
Step 6: Update payment status
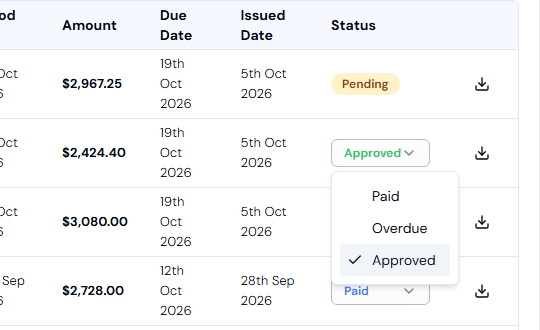
After an invoice is approved, you can change its status from the list without opening it:
- In the Status column, click the status drop-down.
- Choose Approved, Paid or Overdue.
You will see the message "Invoice status updated successfully."
Download invoices
One invoice: click the download icon at the end of the invoice's row. The invoice file downloads to your computer.
Several invoices as one PDF:
- Tick the boxes next to the invoices you want (or tick the box in the header to select all on the page).
- Click Merge & Download PDF.
- You will see "Your invoices are being merged. You'll be notified once it's complete."
- When it's ready, you'll see "Your invoices have been merged successfully!" and SwiftCheckin takes you to the Downloads page, where you can download the file.
Troubleshooting
| Message | What to do |
|---|---|
| Merge failed. Something went wrong while merging the invoices. Please try again. | Try the merge again. If it keeps failing, try fewer invoices at a time. |
| No results found. | No invoices match your filters. Click Clear Filters and try again. |
| The Approve, Decline and Request for Correction buttons are missing | These only show for Pending invoices. |