How to Create and View Categories
A worker category is a group of workers who do similar work, such as "Electricians", "Labourers" or "Crane Operators". Each category has a list of document types those workers need, and you decide which of those documents are Mandatory.
Where categories are used
- When you add a new app user (a worker who uses the SwiftCheckin app), you must choose their Worker Category.
- On an app user's details page, the Worker Category shows which group they belong to.
- On the active app users list, you can filter workers by Category.
- In emergency notification responses, the Category column shows each person's category.
Before you start
- You need at least one document type before you can create a category. If you have none yet, see What Are Document Types and How to Create Them.
- Category is in the Safety section of the left menu. If you cannot see it, these features may not be turned on for your organisation. Ask your SwiftCheckin administrator.
Create a category
Step 1: Open the Category page
- In the left menu, under Safety, click Category.
- The Worker Categories page opens.
Step 2: Start a new category
- Click Add New in the top-right corner.
- A window called Create Category opens.
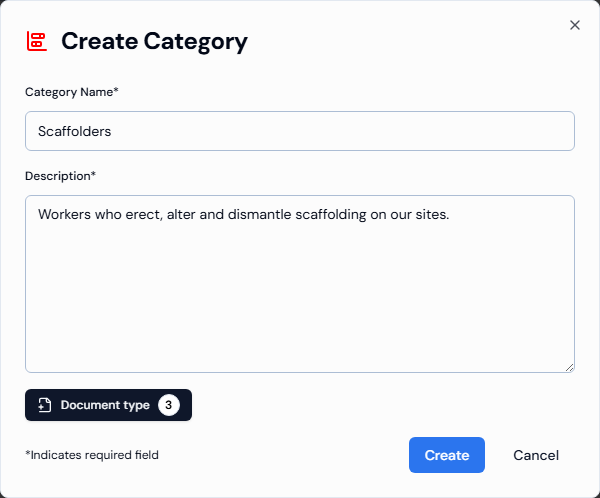
Step 3: Enter the category details
| Field | What to enter |
|---|---|
| Category Name* | The name of the group, for example "Scaffolders". Use 2 to 50 characters. |
| Description* | A short explanation of who belongs in this group. Use 2 to 200 characters. |
Fields marked with * are required.
Step 4: Add the documents this category needs
- Click the Document type button below the description.
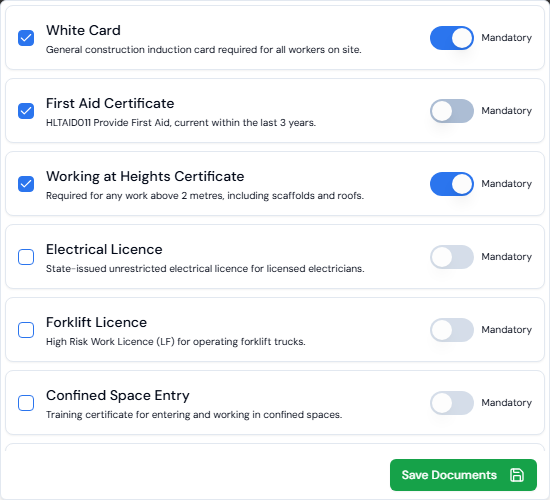
- A list of all your document types opens. Each one shows its name and description.
- Tick the box next to each document these workers need.
- For any ticked document that workers must have, turn on the Mandatory switch. Leave it off if the document is optional.
- Click Save Documents.
The Document type button now shows a number, which is how many documents you added. To change your choices, click Document type again, make your changes and click Update Documents.
Important
The Mandatory switch only works after you tick the document's box.
Step 5: Create the category
- Click Create.
- You will see the message "Category created successfully."
- The new category appears in the list.
To close the window without saving, click Cancel.
View your categories
- In the left menu, under Safety, click Category.
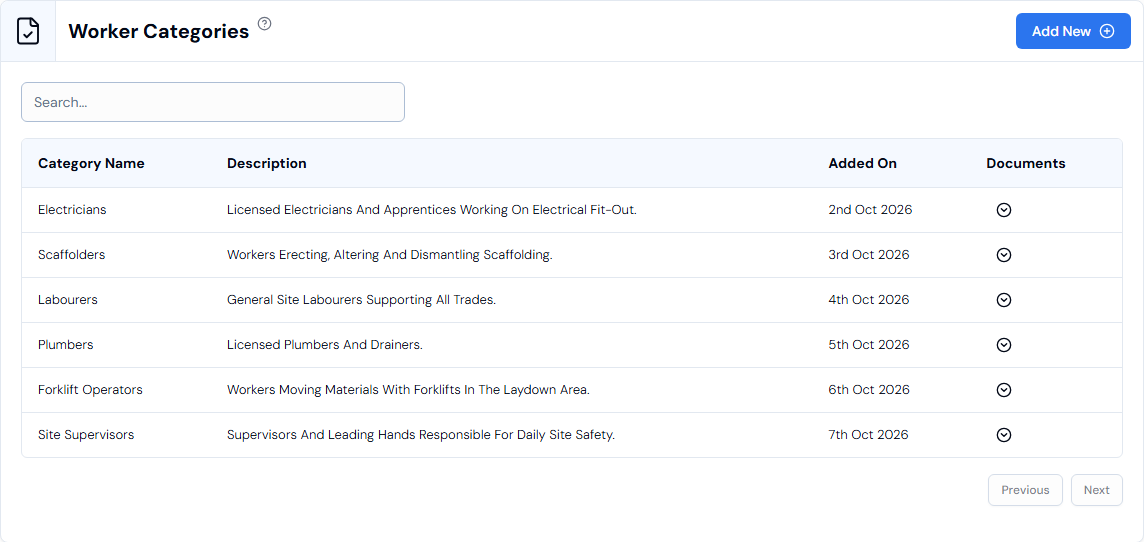
- Each row in the list shows:
| Column | What it shows |
|---|---|
| Category Name | The name of the category. |
| Description | The description you entered. |
| Added On | The date the category was created. |
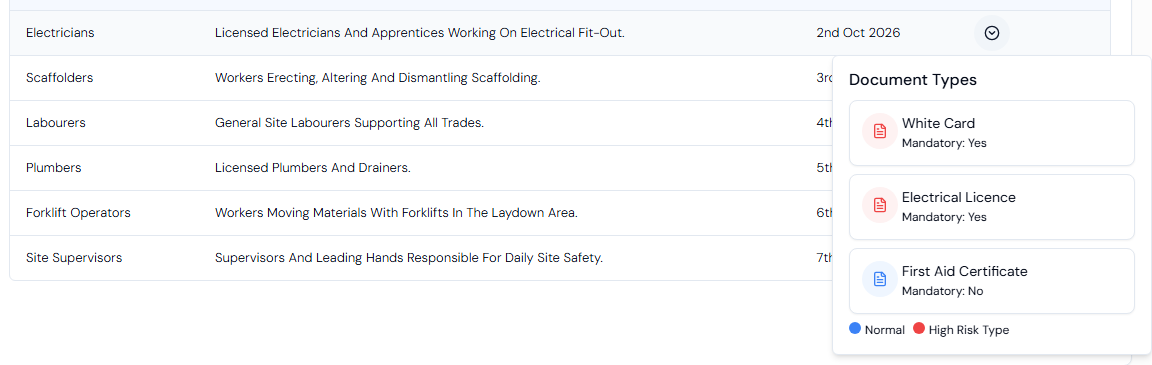
| Documents | Click the arrow button to see the document types in this category. Each one shows Mandatory: Yes or Mandatory: No. |
To find a category quickly, type part of its name into the Search... box. Use Previous and Next at the bottom to move between pages.
Good to know
| Topic | Details |
|---|---|
| Editing and deleting | There is no option on this page to edit or delete a category. |
| Same document, different rules | The same document type can be mandatory in one category and optional in another. |
Troubleshooting
| Message | What it means and what to do |
|---|---|
| "Please add document type before creating category." | You clicked Create without adding any documents. Click Document type, tick at least one document, click Save Documents, then click Create again. |
| No documents found. (inside the document list) | You have not created any document types yet. Create one first, then come back. |