How to View Crew Schedules
The Crew Schedule shows every worker's tasks on one calendar. At a glance, you can see who is working, where, and when — and who is free.
Before you start
- Your organisation must have the Scheduler turned on. If you can't see Scheduler in the left menu, contact your SwiftCheckin administrator.
- At least one project must exist. Scheduler appears in the left menu only once your organisation has at least one project.
Step 1: Open the Crew Schedule
In the left menu, under Field Operations, click Scheduler.
The Crew Schedule page opens. It shows the current week.
Step 2: Read the schedule
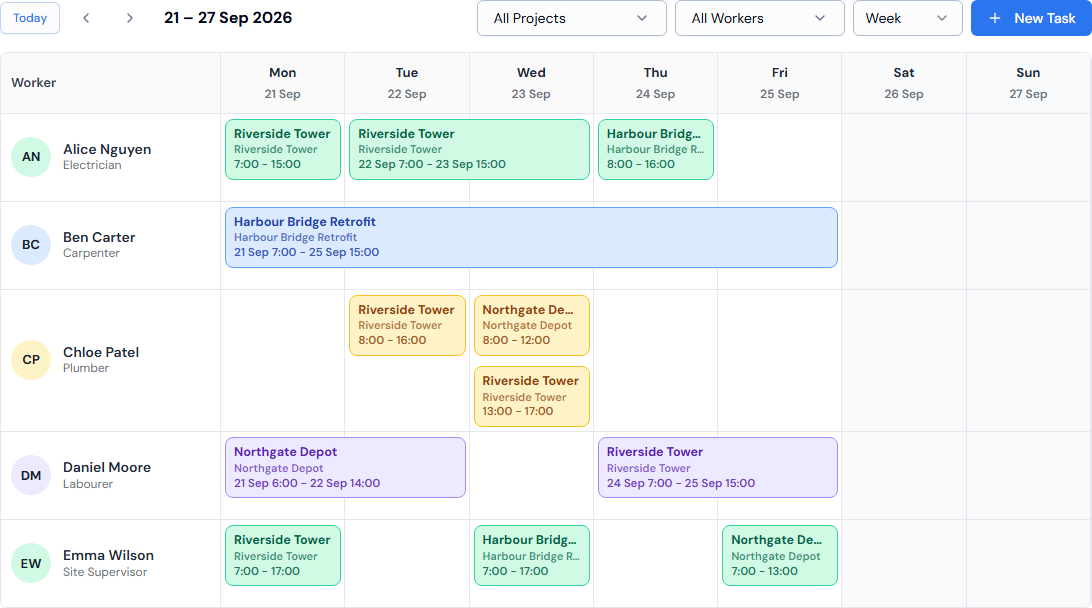
The schedule is laid out like a table:
- Each row is a worker. You'll see their initials, full name and job type (for example Electrician). Workers with nothing booked are still listed, so you can spot who is free.
- Each column is a day. Weeks run Monday to Sunday. Weekends are shaded grey.
- Each coloured block is a task. A block shows the task title, the project and the start and finish times, for example 8:00 - 17:00.
Good to know:
- A task that lasts several days stretches across those days. It shows the dates with the times, for example 21 Sep 7:00 - 25 Sep 15:00.
- If a worker has more than one task on the same day, the blocks are stacked on top of each other.
- If a task starts before, or ends after, the dates on screen, the block is cut off at the edge.
- Colours just help you tell workers apart. They don't mean anything about the project or the task's progress.
- Times are shown in your computer's local time.
Step 3: Move between dates and views
Use the bar above the schedule:
| Button | What it does |
|---|---|
| Today | Jumps back to today. It also refreshes the schedule. |
| ‹ and › | Go back or forward by one day, week or month, depending on the view. |
| Date range | Shows the dates you're looking at, for example 21 – 27 Sep 2026. |
| Day / Week / Month | Choose how many days to show at once. |

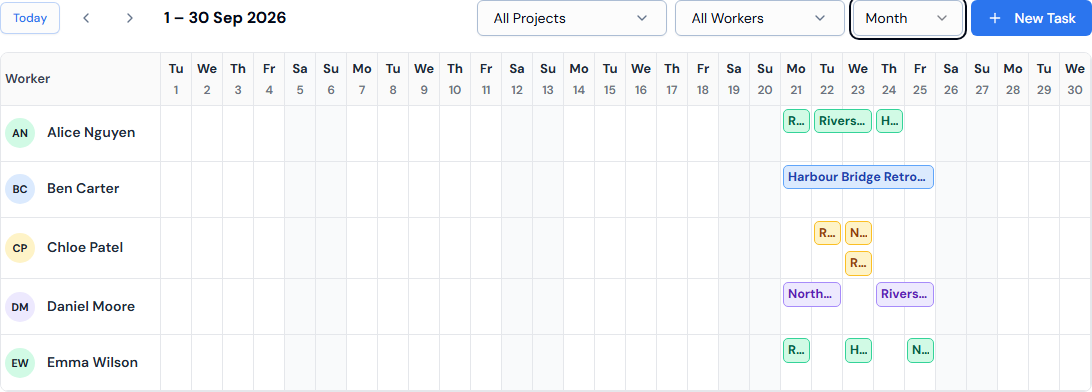
The Month view squeezes the whole month onto the screen. To save space, it shows only the task title and hides the job type, project and times. Switch to Week or Day to see the full details.
Step 4: Filter by project or worker
At first the schedule shows All Projects and All Workers. To see less:
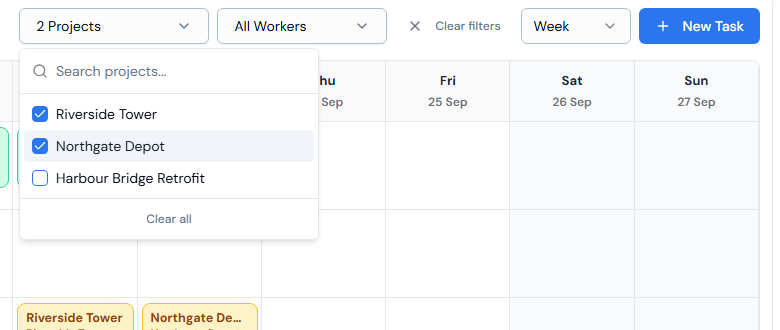
- Click All Projects and tick one or more projects. Type in Search projects... to find one quickly.
- Click All Workers and tick one or more workers. Type in Search workers... to find someone.
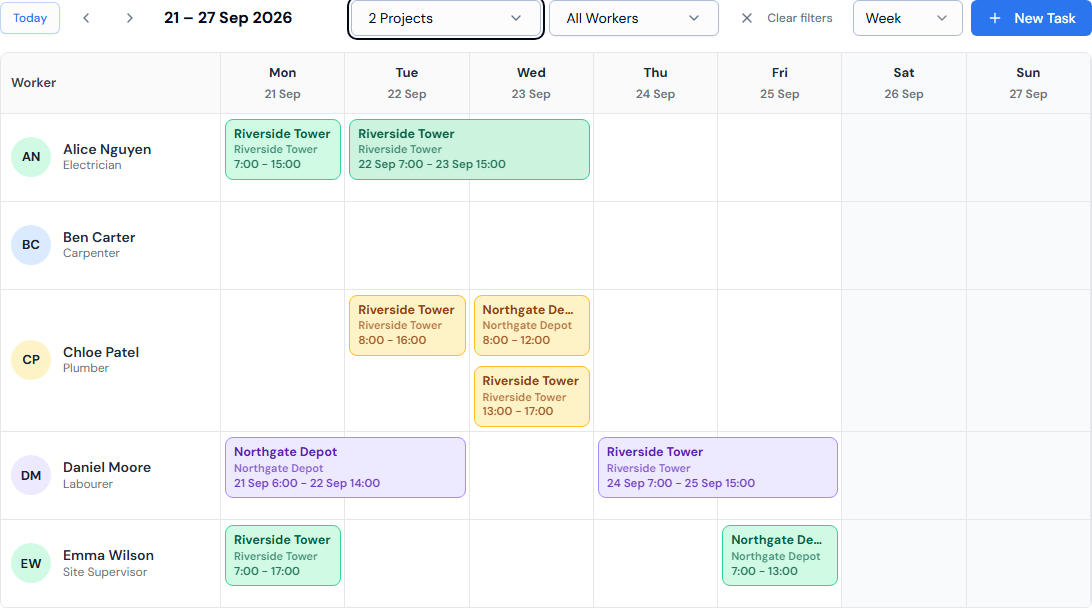
Ticked items move to the top of the list. The filter button changes to show what you picked, for example 2 Projects.
To remove filters:
- click Clear all at the bottom of a filter list, or
- click Clear filters in the toolbar to remove both filters at once.
Pick exactly one project to see only the active workers on that project. With no project, or several projects, picked, you see all active workers in your organisation.
When you change the project filter, the worker filter is cleared, because the list of workers changes.
Step 5: Open a task
Click any task block to open the Task Details panel. There you can see who it's assigned to and make changes. See How to Edit a Crew Schedule.
Troubleshooting
| Problem | What to do |
|---|---|
| Scheduler isn't in the left menu | The Scheduler isn't turned on for your organisation. Contact your SwiftCheckin administrator. |
| A worker is missing | Check the worker filter. If one project is picked, only active workers on that project are listed. |
| A task you expect isn't showing | Check the dates and the view, then clear any filters. |