How to View Document Types
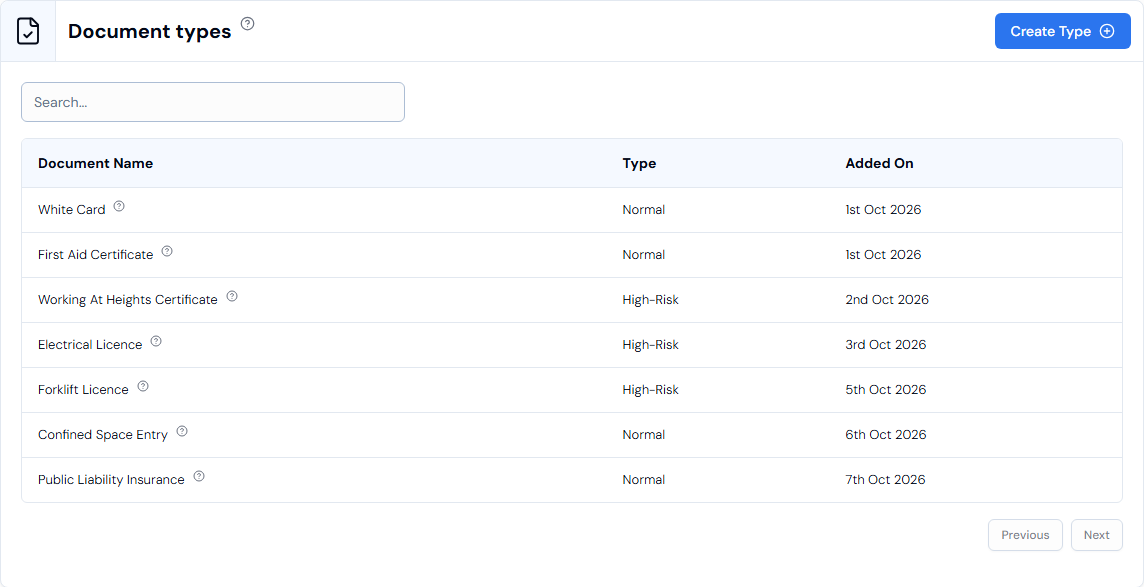
The Document types page lists every document type your organisation has added, such as licences and certificates. Use it to check what is already set up before you create a new one or build a category.
Before you start
- Document Types is in the Safety section of the left menu. If you cannot see it, these features may not be turned on for your organisation. Ask your SwiftCheckin administrator.
Step 1: Open the Document Types page
- In the left menu, under Safety, click Document Types.
- The Document types page opens with a list of your document types.
Step 2: Read the list
Each row shows one document type.
| Column | What it shows |
|---|---|
| Document Name | The name of the document. Hover over or click the small ? icon next to the name to read its description. |
| Type | Either normal or high-risk. |
| Added On | The date the document type was created. |
If there are no document types yet, you will see No results.
Step 3: Search for a document type
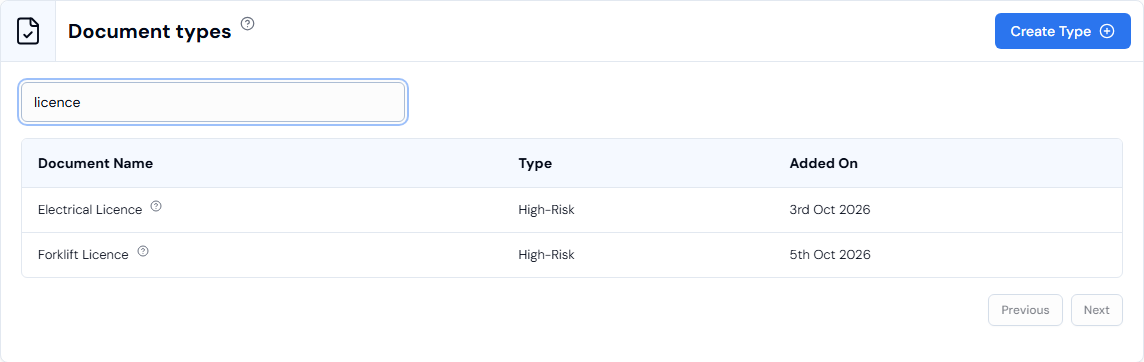
- Click in the Search... box above the list.
- Start typing part of the document name.
- The list updates as you type to show only matching names.
To see the full list again, clear the search box.
Step 4: Move between pages
If you have a long list, use the Previous and Next buttons at the bottom of the page.
Good to know
| Topic | Details |
|---|---|
| Editing and deleting | This page is for viewing and adding document types. There is no option to edit or delete a document type. |
| Adding a new type | Click Create Type. You can also add a type while uploading a document, using Add new type. See What Are Document Types and How to Create Them. |