What Are Document Types and How to Create Them
A document type is a kind of document you expect your workers to have, such as a white card, a first aid certificate or a forklift licence. You set up your document types once, and then link them to worker categories so SwiftCheckin knows which documents each group of workers needs.
You can also use document types to label files you upload for an app user, a company or a project.
How document types fit together
- You create a document type (for example, "Working at Heights Certificate").
- You create a category (a group of workers, such as "Electricians") and choose which document types belong to it.
- When you add the category, you decide if each document is Mandatory (must have) or optional.
So document types are the building blocks. You need at least one before you can create a category. See How to Create and View Categories.
Before you start
- Document Types is in the Safety section of the left menu. If you cannot see the Safety section or the Document Types item, these features may not be turned on for your organisation. Ask your SwiftCheckin administrator.
Step 1: Open the Document Types page
- In the left menu, under Safety, click Document Types.
- The Document types page opens and shows all the document types you have already added.
Step 2: Start a new document type
- Click Create Type in the top-right corner.
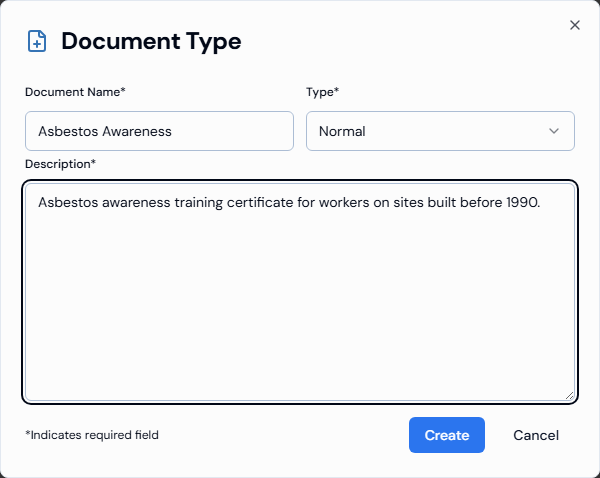
- A window called Document Type opens.
Step 3: Fill in the details
| Field | What to enter |
|---|---|
| Document Name* | The name of the document, for example "White Card". Use 2 to 50 characters. |
| Type* | Choose Normal for everyday documents, or High Risk for documents linked to high-risk work (for example, a licence to operate heavy machinery). |
| Description* | A short explanation of the document, for example what it is or who issues it. Use 2 to 200 characters. |
Fields marked with * are required.
Step 4: Save the document type
- Click Create.
- You will see the message "Document Type created successfully."
- The new document type now appears in the list.
To close the window without saving, click Cancel.
Add a document type while uploading a document
You do not have to leave what you are doing to add a missing document type. You can add one while you upload a file on the Documents tab of an app user, a company or a project.
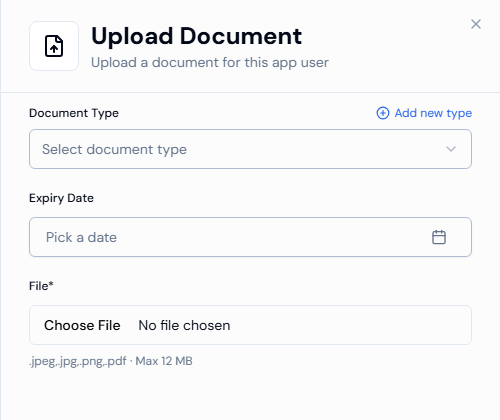
- On the Documents tab, click Upload Document. The Upload Document panel opens.
- Next to Document Type, click Add new type.
- The same Document Type window opens. Fill in the details as in Step 3 above, then click Create.
- The new type is added to the list and is selected for you in the Document Type box.
- Finish your upload as normal.
A document type added this way is saved like any other. It also appears on the Document types page and can be used in categories.
Good to know
| Topic | Details |
|---|---|
| Mandatory or optional | You choose whether a document is mandatory when you add it to a category, not when you create the document type. This lets the same document be mandatory for one group of workers and optional for another. |
| Editing and deleting | There is no option to edit or delete a document type. Check the name and description carefully before you click Create. |
Troubleshooting
| Problem | What to do |
|---|---|
| The window shows a message under a field and does not save | Check that every required field is filled in. The name must be 2 to 50 characters and the description 2 to 200 characters. |