Check in and out
Check in when you arrive, record your breaks, and check out when you finish so your hours go on your timesheet.
Check in
Turn on Location and Precise Location for SwiftCheckin. If your site uses breadcrumbing, set location to Always (iPhone) or Allow all the time (Android).
- Tap Checkin. It's on the Home screen.
- Choose your project. Tap Select Project and pick it; the gate location shows underneath.
- Check in. Tap Check-in.
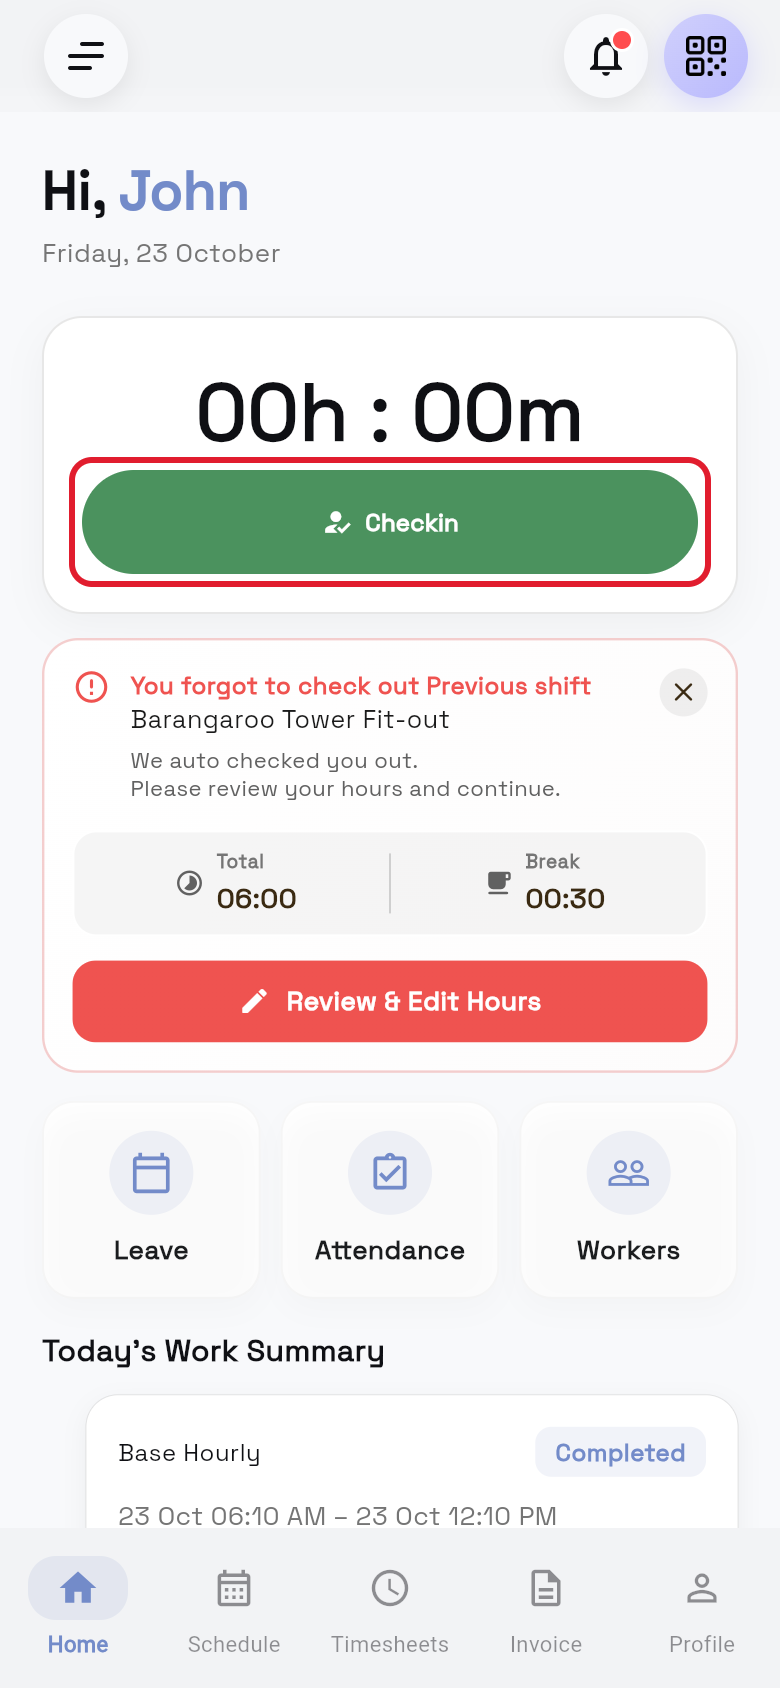
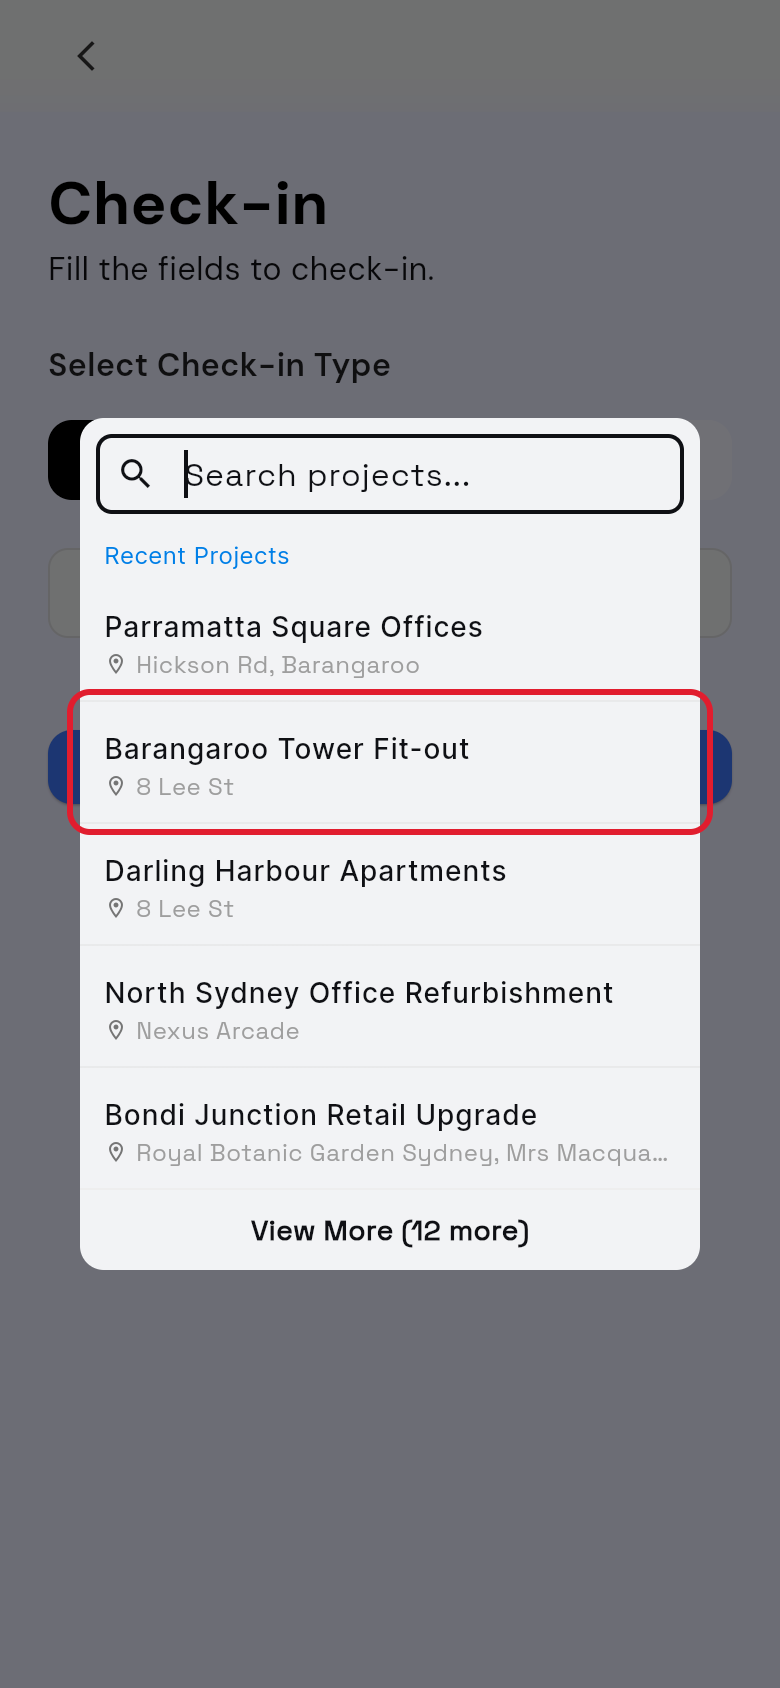
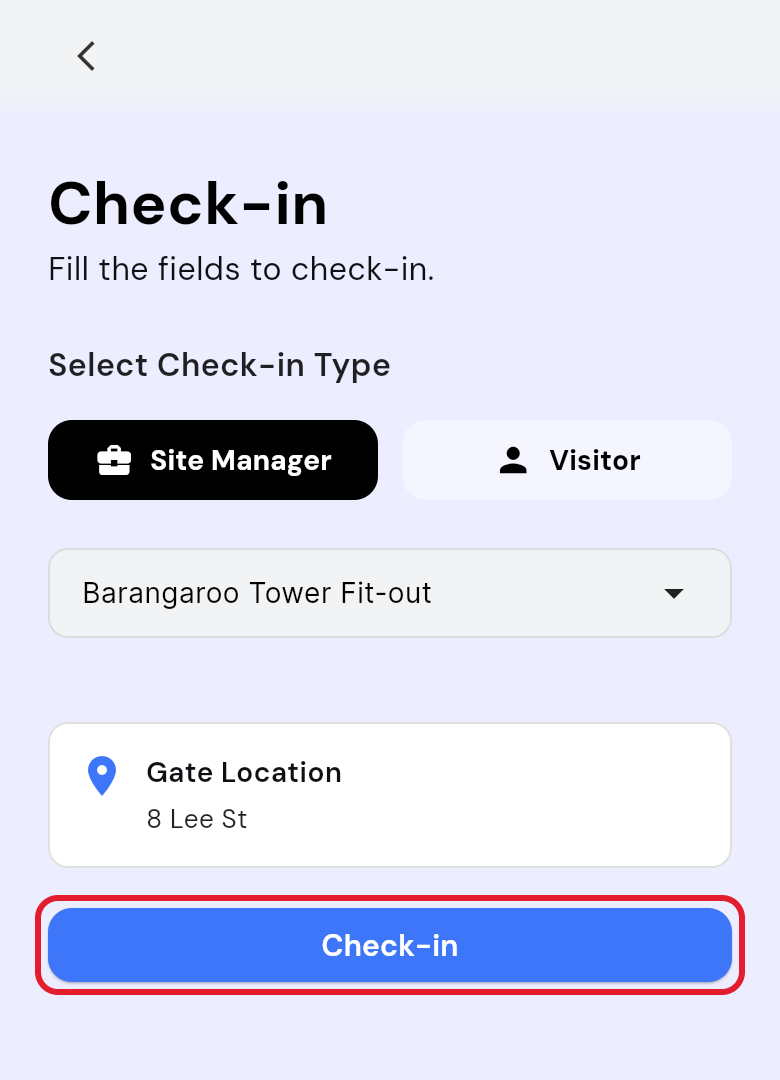
You see Check-in successful! and your work clock starts.
If the site has more than one way in, pick the gate you're at in Select Gate. If there's only one, it's picked for you.
If your company checks your location, these check-ins are marked as suspicious:
- Location is turned off on your phone.
- Precise Location is turned off, and you check in anyway.
- You are outside the site boundary.
- You are not added to the project.
- You check in without location, using the Check-in assistant.
If you're on an upper floor or the signal on site is weak, your check-in is marked as low accuracy instead. Your site manager and the office can see these check-ins. See Suspicious check-ins.
Check in with a QR code
Scan the QR code at the site gate to fill in the project and gate; the same code also checks you out. You need Camera on for SwiftCheckin and must work under the same organisation as the site.
- Open the scanner. On Home, tap the QR code button in the top-right corner.
- Scan the gate's QR code. Hold your phone still until it scans.
- See what opens. It depends on whether you're checked in:
- Not checked in: Check-in opens with Selected Project and the gate filled in.
- Already checked in: check-out opens with the gate chosen. See Check out.
- Fill in other fields. Complete any other fields you see.
- Check in. Tap Check-in.
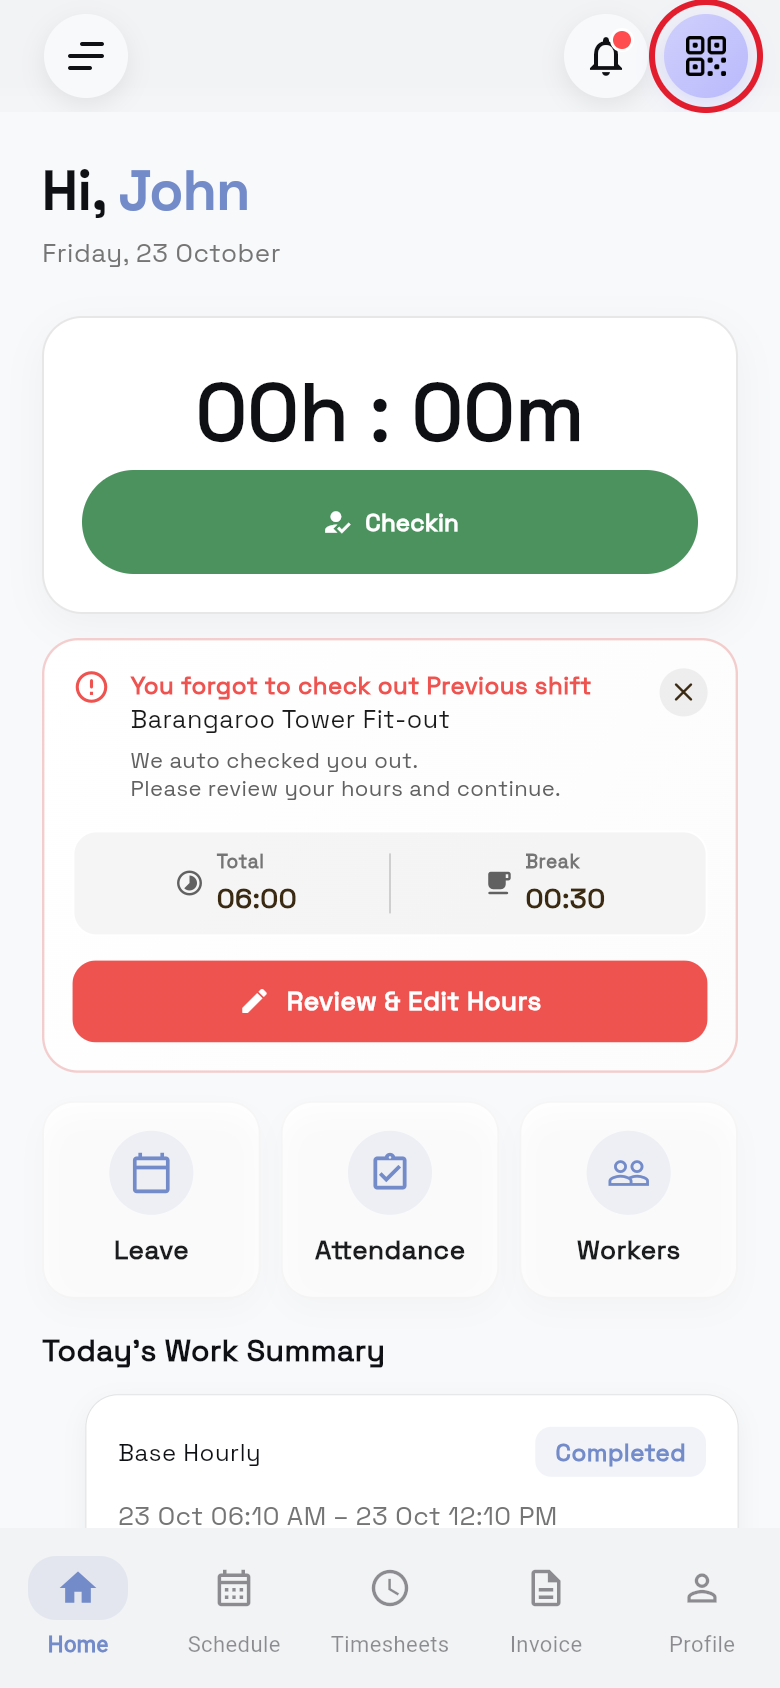
You see Check-in successful! and your work clock starts. To close the scanner without scanning, tap the back arrow in the top-left corner.
Check in with the map
Some organisations show a map of you and nearby site gates when you tap Checkin. You need location on and a good internet connection.
- Tap Checkin. On Home, tap Checkin; the map finds you and nearby gates.
- Check the map. You're Here marks you; the closest gate in Nearby Project is chosen.
- Change gate if needed. Tap its pin or tap it in the Nearby Project list.
- Check the button. It shows if you're close enough:
- CHECK IN: you're inside the site area.
- OUT OF LOCATION: you're too far, e.g. 0.4 km Away. Move closer, then tap Refresh.
- Fill in any fields. They show above the map.
- Check in. Tap CHECK IN.
You see Check-in successful! and your work clock starts. If the map isn't working and you are sure you're on site, tap Any Issues ? Use old check-in page to use the normal Check-in screen.
Take a break
The break button only shows while you are checked in, and only if your organisation records breaks.
- Find the break button. It's the round coffee cup next to Checkout on Home.
- Tap it to start. The cup turns red and a break timer shows under your clock.
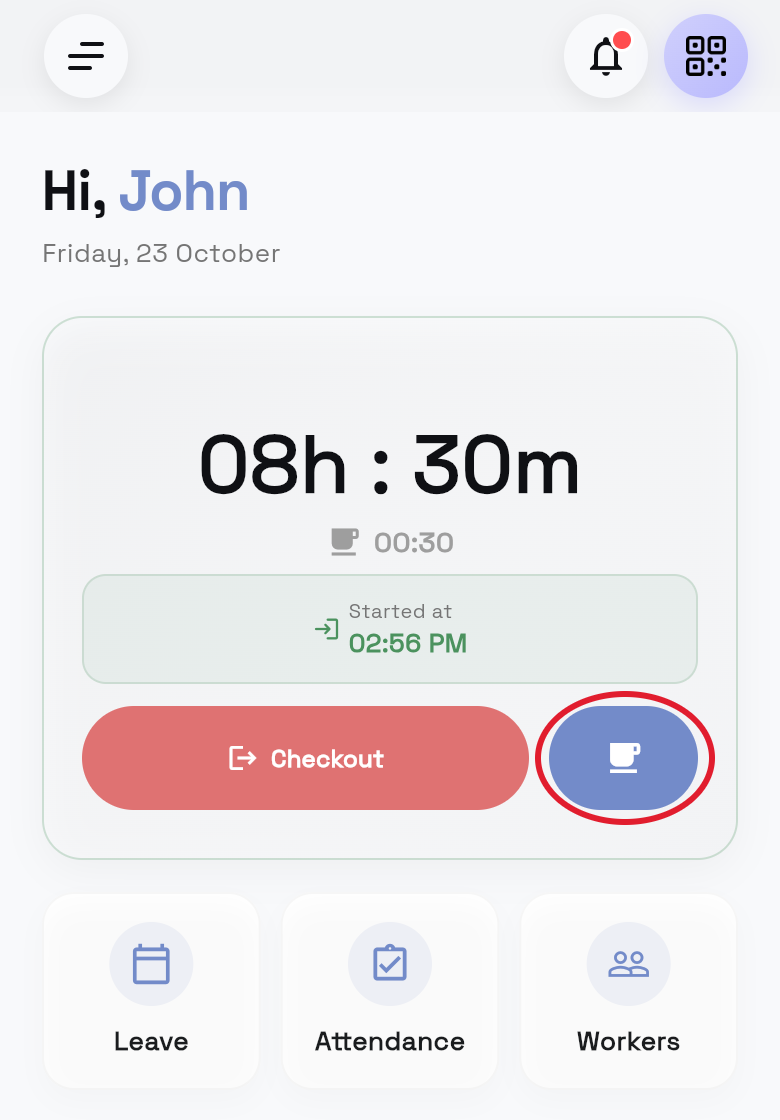
To end the break, tap the coffee cup again. You can take more than one break; they're added up in BREAK HOURS when you check out.
Your Home screen while checked in
- Look at the work clock. It shows time worked, e.g. 02h : 15m (00h : 00m before check-in).
- Check your pay rate. Its name shows above the clock while you're checked in.
- Check your start time. Started at shows when you checked in.
- Check your breaks. If breaks are recorded, a coffee cup and timer show under the clock.
- Look at Today's Work Summary. Each card is one block of work, with pay rate, times and project:
- Completed: hours you have worked.
- Threshold: hours set for this pay rate.
- Remaining: hours left before the threshold.
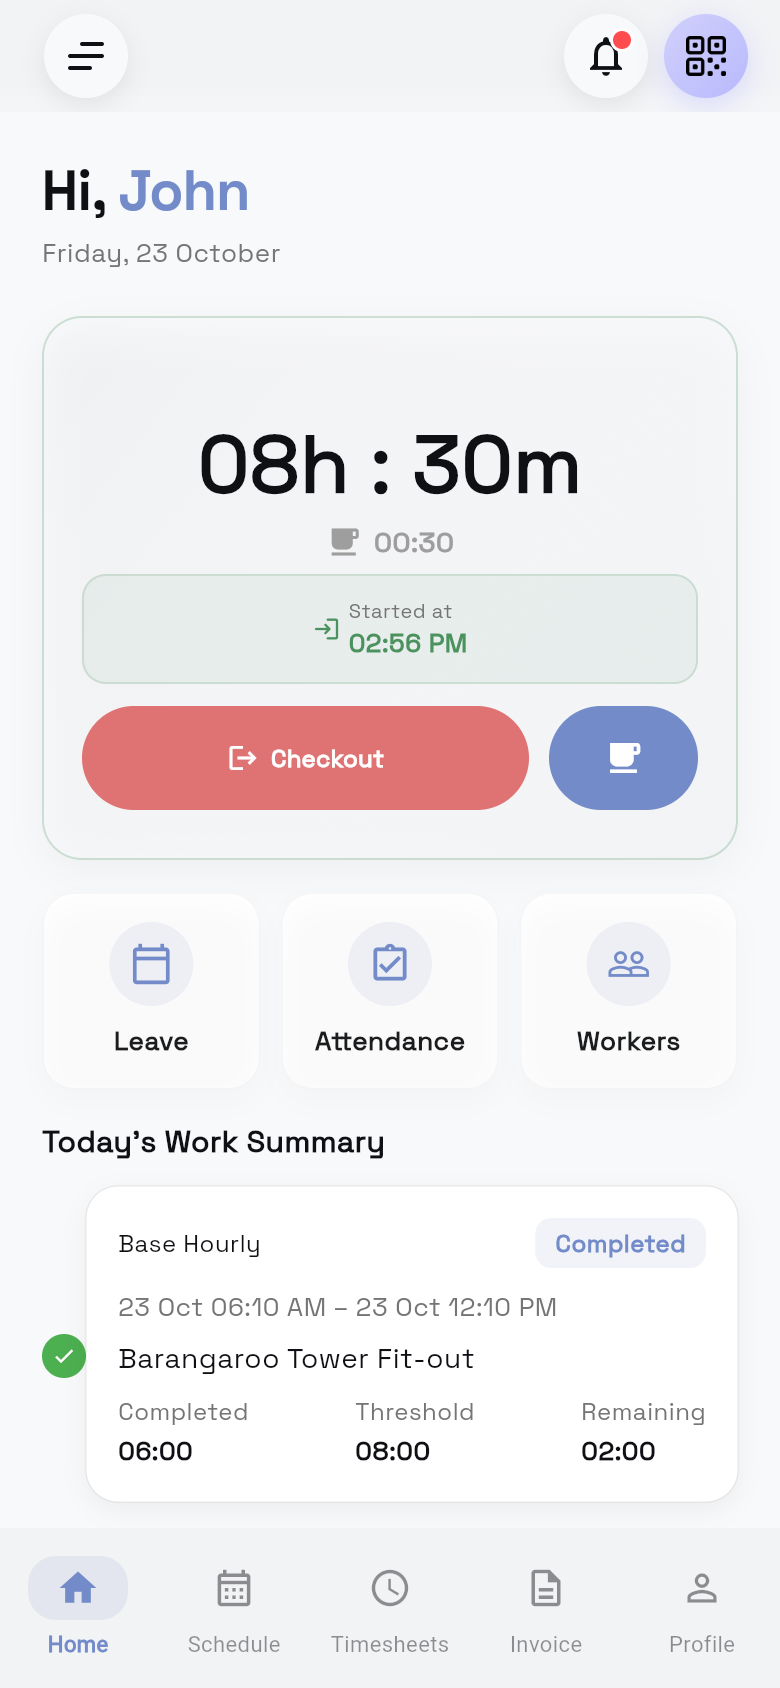
If the clock looks wrong, pull down on the Home screen to refresh it.
Check out
Check out when you finish work. If your organisation checks your location, stay on site until you have checked out.
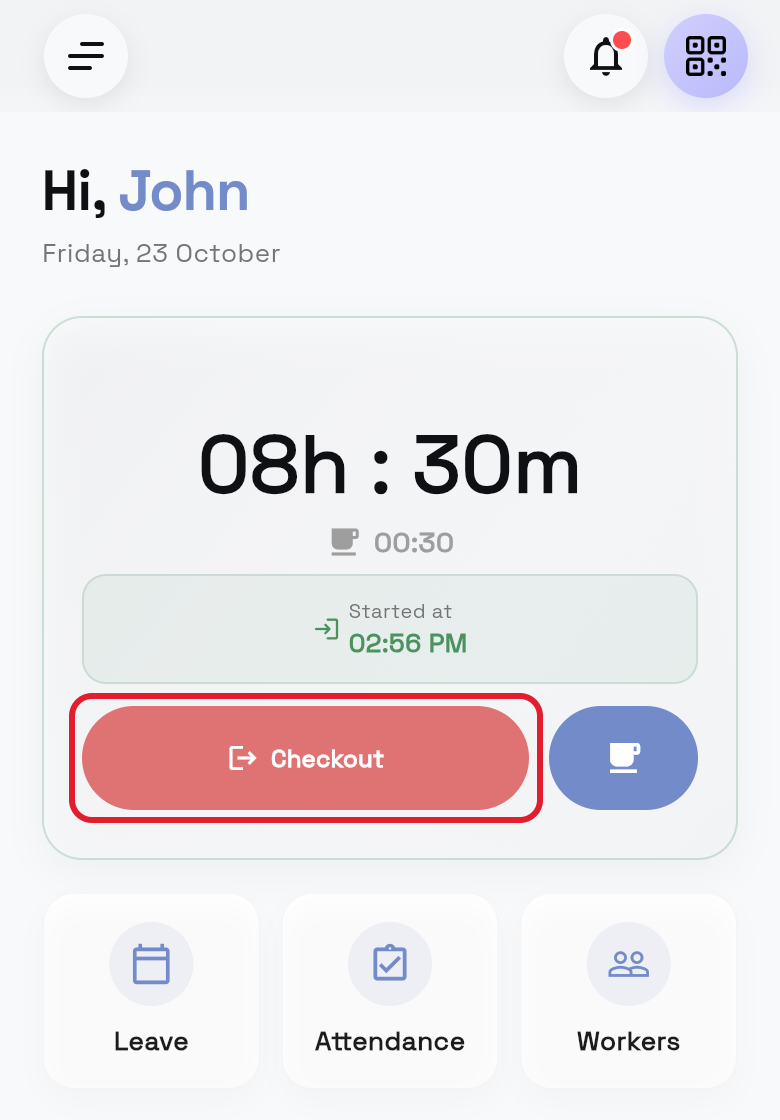
- Tap Checkout. Tap it on Home, or scan the site's QR code.
- Choose your gate. If SELECT GATE shows, pick it; you'll see Inside boundary or Outside boundary.
- Read the hours message. For example, Looks good! or That's a long shift!
- Check your hours. Fix HOURS WORKED and BREAK HOURS if wrong. See My hours.
- Check timesheet hours. Timesheet hours (after break) is what goes on your timesheet.
- Fill in extra sections. Site managers may enter progress in Updated Project Progress (%).
- Add a note if you want. Use NOTES (Optional), for example to say why you left early.
- Submit your hours. Tap the green Submit Timesheet — button (Confirm & Checkout if under 15 minutes).
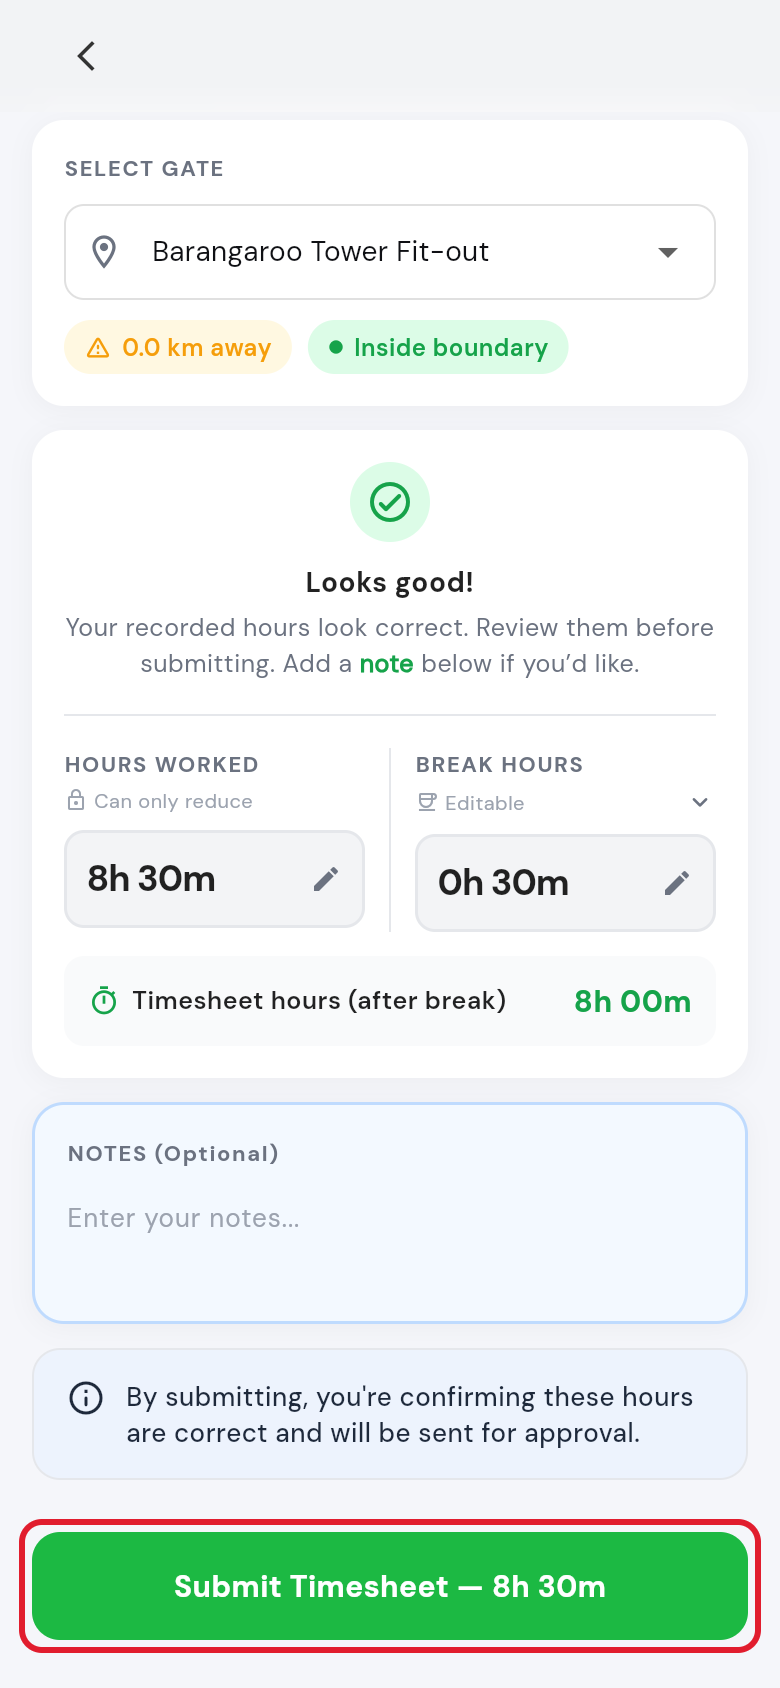
You see Check-out successful and the Checkin button shows again. By submitting, you confirm your hours are correct. They are sent to your organisation for approval.
Breadcrumbing (automatic check-out)
Breadcrumbing checks you out automatically if you leave the site boundary and don't come back, so your timesheet doesn't keep running. Your organisation turns it on for a project or worker.
Breadcrumbing only works if SwiftCheckin can use your location all the time. Set location to Always (iPhone) or Allow all the time (Android). The app shows you how when you check in. On Android, also let the app run in the background (no battery saving for SwiftCheckin).
- You check in. The app starts watching the site boundary.
- You leave the boundary. You get a notification that you have gone out of the boundary.
- Come back within 30 minutes. If you do, you stay checked in.
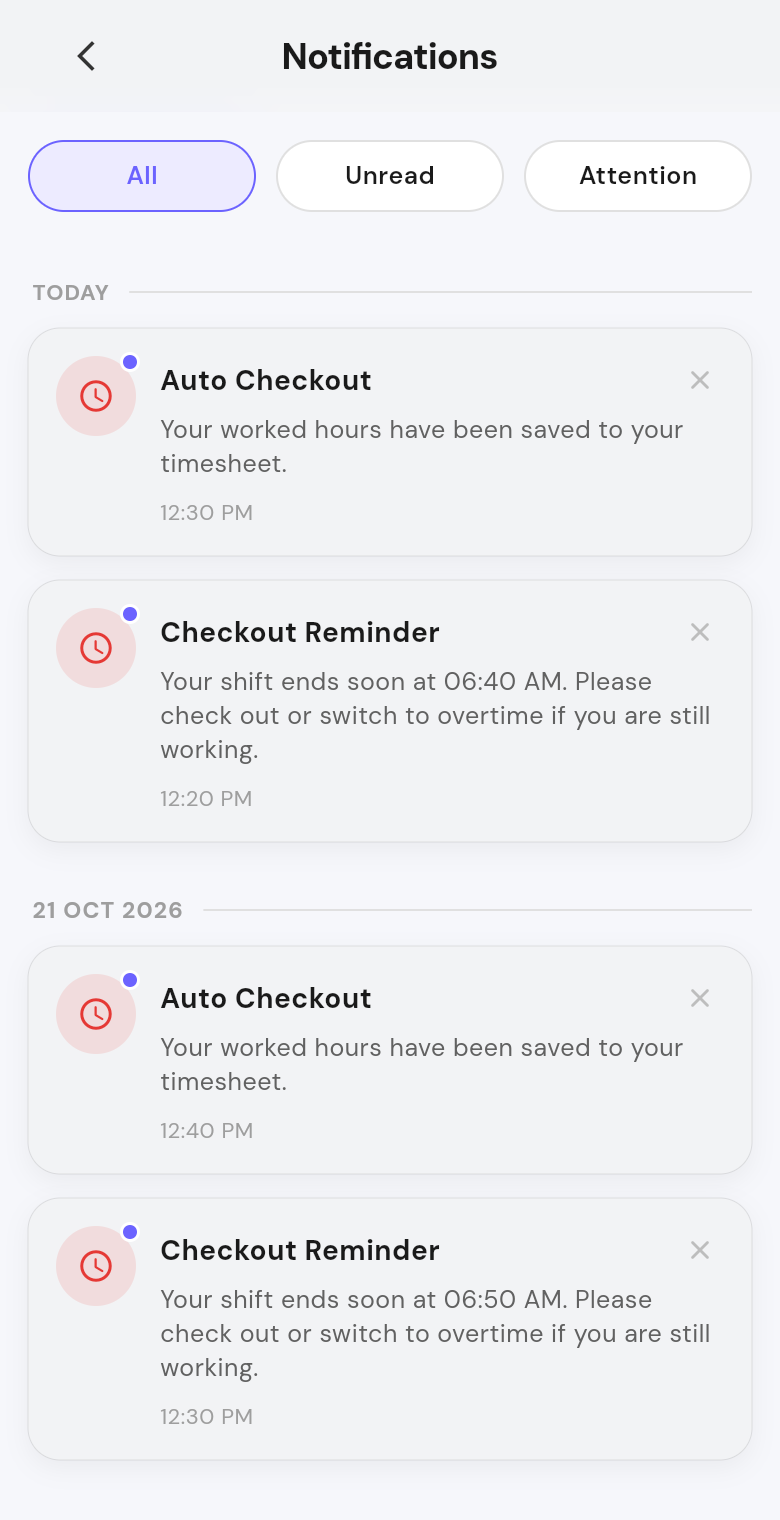
- You don't come back in time. You're checked out and get an Auto Checkout notification.
- Check that shift's hours. Do it next time you open the app. See My hours.
| Situation | What happens |
|---|---|
| You step out for less than 30 minutes | You stay checked in. |
| You take a long break off site | You are checked out after 30 minutes. Check in again when you come back. |
| You check out yourself | Breadcrumbing stops. |
| Location is not set to Always | The app asks you to change it before it finishes your check-in. |
The app only uses your location while you are checked in. Once you check out, or are checked out, it stops. Your location is never tracked outside work.
Questions and answers
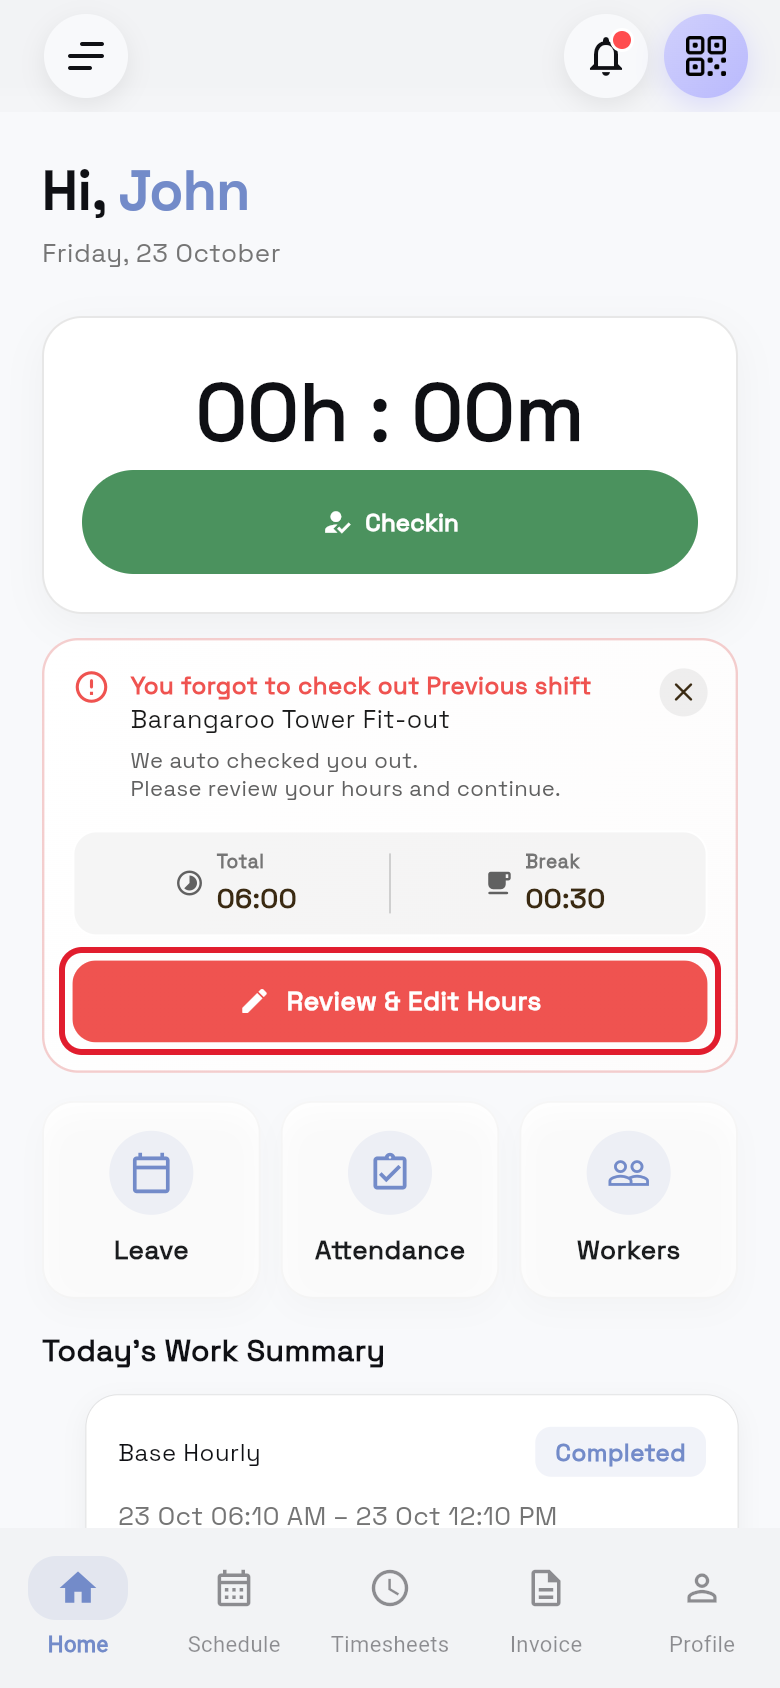
Why does it say "You forgot to check out Previous shift"?
Your last shift was never closed, or you were checked out automatically. Check those hours, then tap Submit Timesheet & Continue.
I forgot to start or end my break. What do I do?
If a break is still running, tap the coffee cup button to end it. Then fix your total break time in BREAK HOURS when you check out.