My timesheet hours
A timesheet is made each time you check out. This page shows you how to see your timesheets and their status, fix your hours, and add a timesheet by hand.
View your timesheets
You only see timesheets for the organisation you are working under. To see another organisation's timesheets, switch organisation first in Your account.
- Open Timesheets. Tap Timesheets in the bottom bar.
- Pick My Timesheets. If you see two tabs, tap My Timesheets (most workers don't see tabs).
- Set the dates. Your current pay period shows first. Tap the dates, choose one, then tap Apply Filter:
- Pay Periods: pick a pay period.
- Custom Range: pick a start and end date.
- Pick a count. Tap PENDING, APPROVED or TOTAL to show only those.
- Scroll the list. Cards are grouped by day and show the project, Hours:, status, START TIME: and END TIME:.
- Open a card. Tap it to see Verified Hours, Payment Hours, Actual Hours and more. Tap again to close.
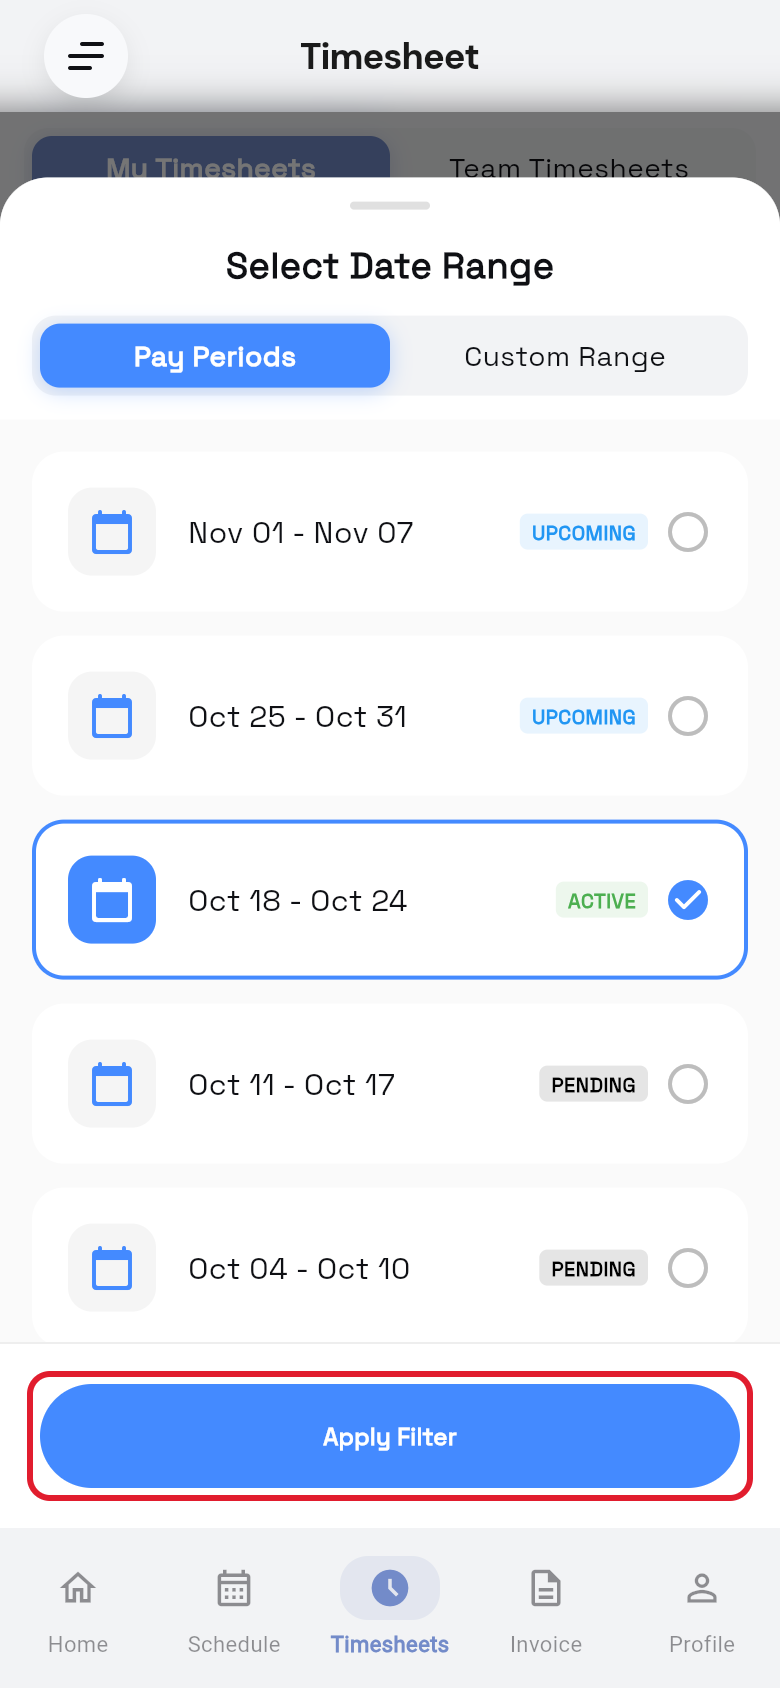
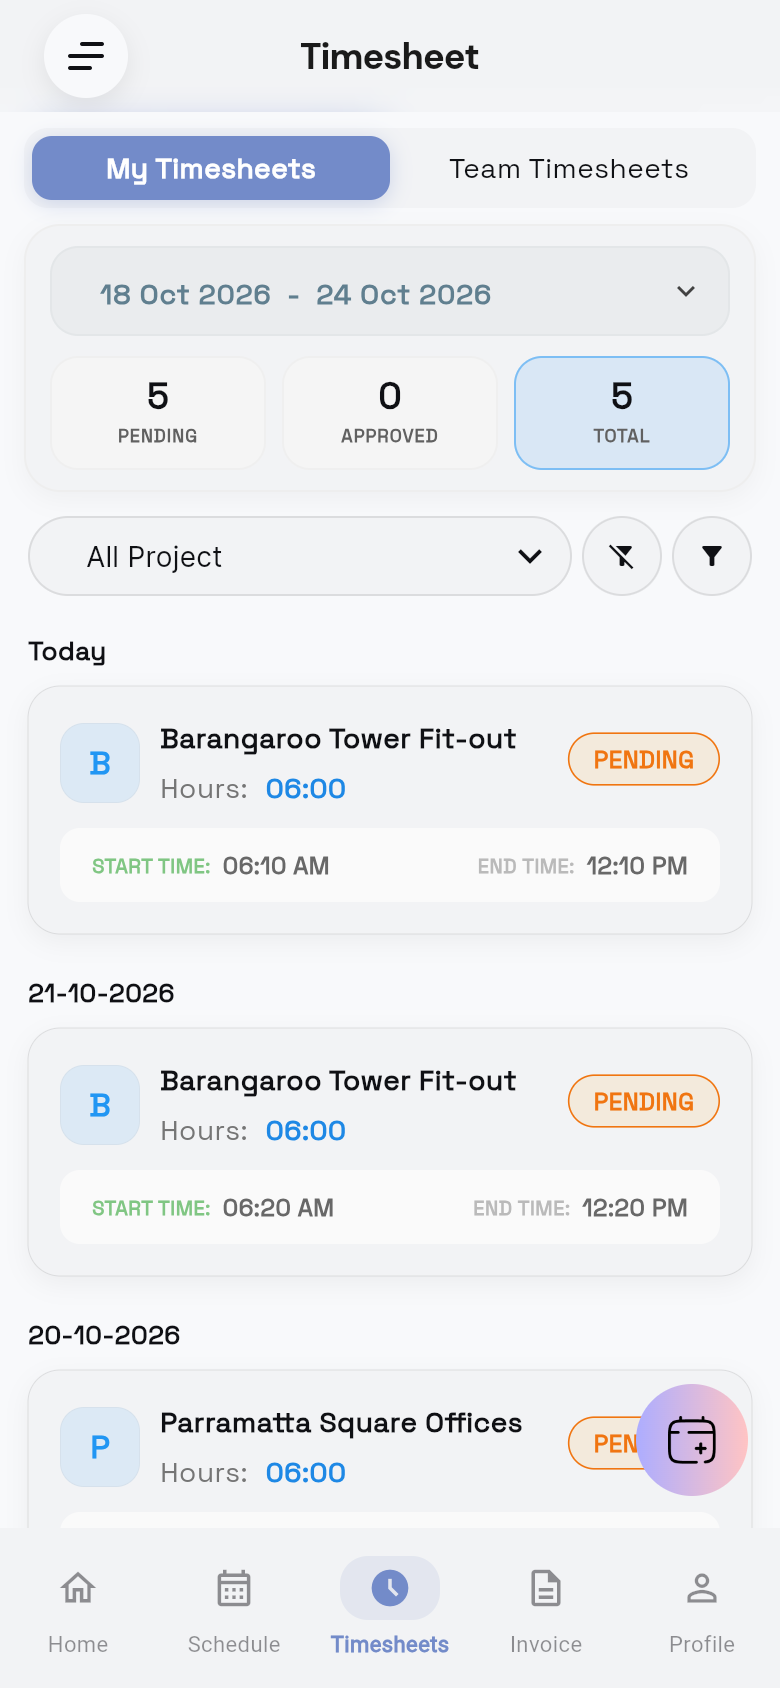
You see your timesheets for the dates you picked. Scroll down to load more.
To filter the list:
- By project: tap All Project and pick a project. You can type to search.
- By pay item: tap the filter button (funnel) to open Filter Timesheets. Choose a Pay Item, then tap Apply Filter.
- Clear all filters: tap the funnel with a line through it. Or tap Clear in Filter Timesheets.
Timesheet statuses
Every timesheet has a status that shows where it is in the approval process. You see it on the right of each card in Timesheets.
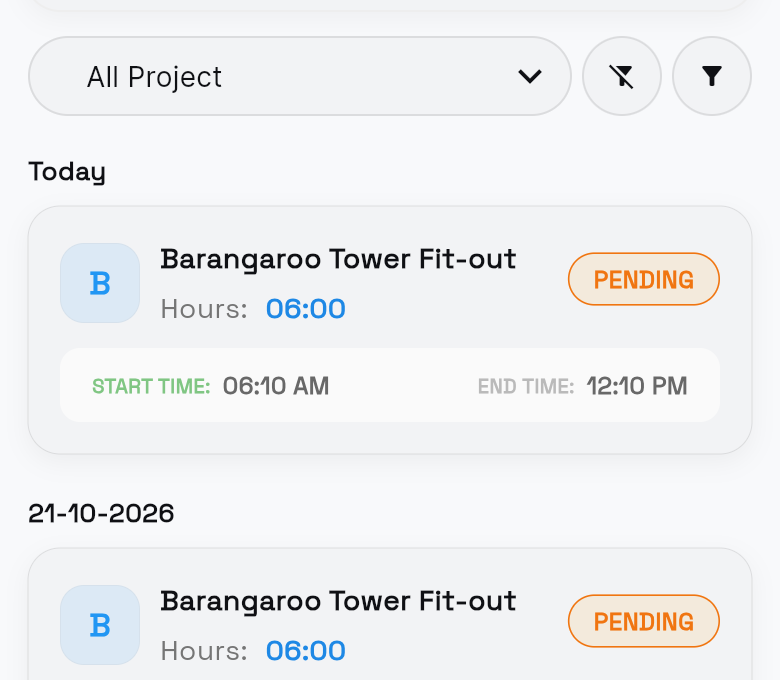
| Status | Colour | What it means |
|---|---|---|
| PENDING | Orange | You have sent the timesheet. Nobody has checked it yet. |
| TIME VERIFIED | Blue | A site manager has checked your hours. It is waiting for final approval. |
| APPROVED | Green | Your organisation has approved the timesheet. |
| DECLINED | Red | Your organisation did not accept the timesheet. |
TIME VERIFIED is only used if your organisation asks site managers to check hours first. Otherwise, your timesheet goes from PENDING to APPROVED or DECLINED.
When you tap a card, you also see:
- Actual Hours: the hours recorded for the shift.
- Verified Hours: the hours a site manager checked.
- Payment Hours: the hours you will be paid for.
See your check-in history in My Activity
My Activity lists your past check-ins and check-outs, with the project and hours for each. It shows the organisation you are working under.
- Open the menu. Tap ☰ in the top-left corner of Home.
- Tap My Activity. The Activities screen opens.
- Scroll the list. Each card shows the project (or GENERAL), the HRS worked, and CHECK IN and CHECK OUT times.
- ONSITE means you are still checked in.
- Pick a date range. Tap Change Range next to DATE RANGE, choose the dates, then tap Apply.
- Clear the range. Tap Clear Filter to go back to the full list.
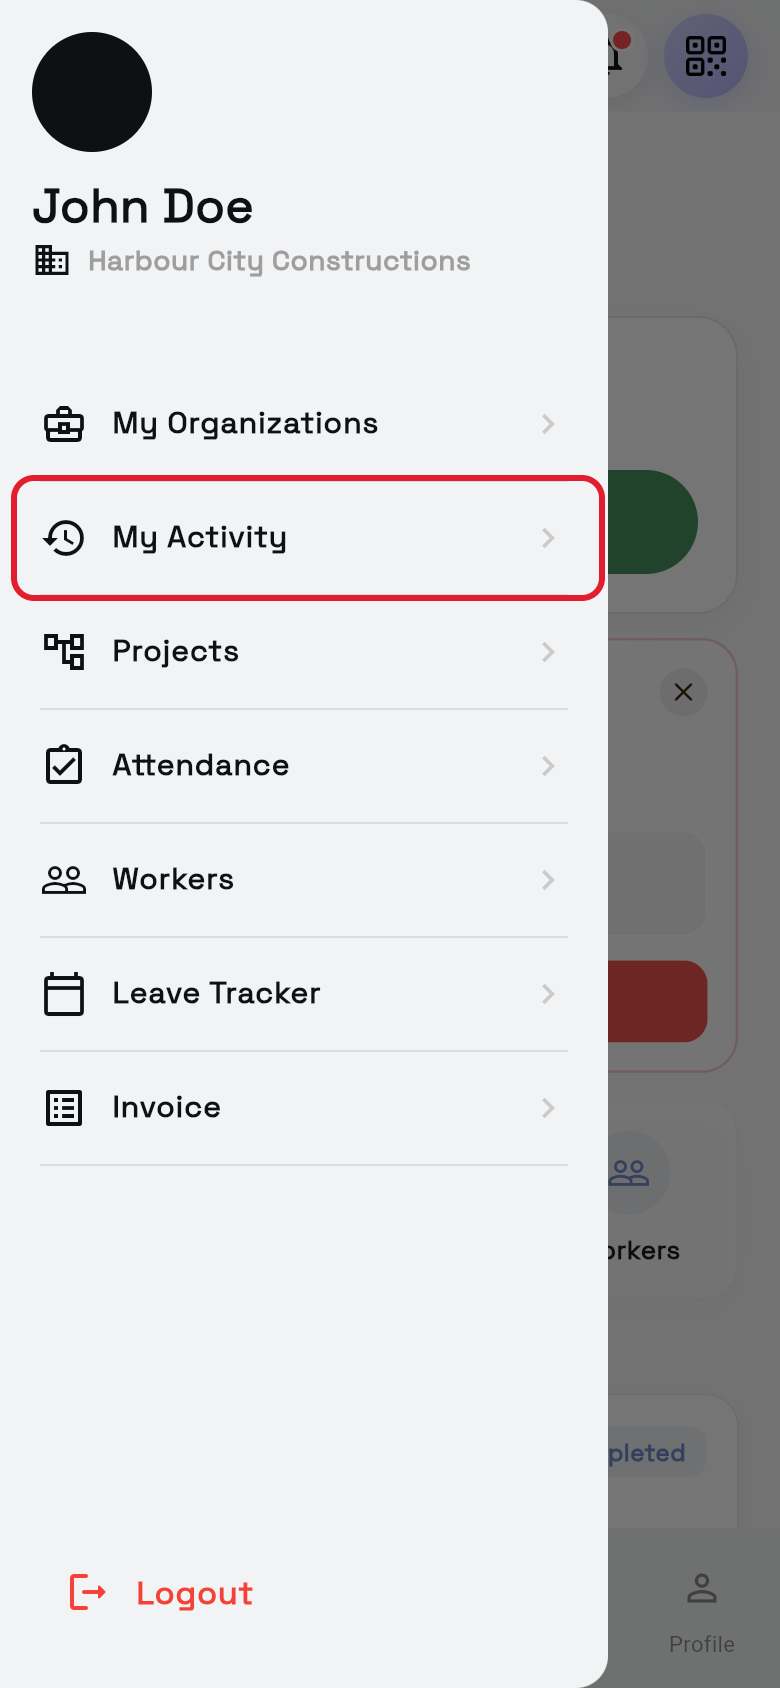
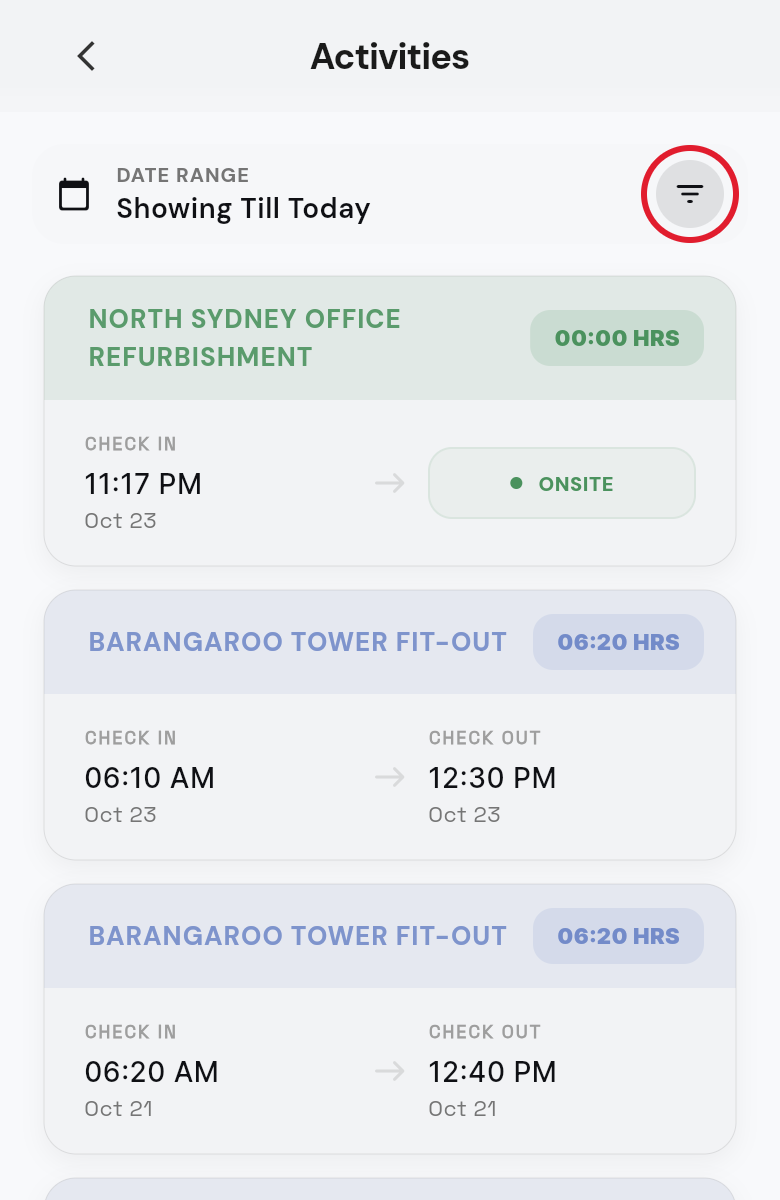
The list shows your check-ins and check-outs for the dates you chose. Without a date range, it says Showing Till Today.
Change your hours or breaks when you check out
Fix your hours on the check-out screen before you submit your timesheet, for example if you forgot to check out on time or forgot to record a break. See Check in and out for how to check out.
You only see the hours if you have worked more than 15 minutes. BREAK HOURS only shows if your organisation records breaks.
Change your worked hours
- Tap the hours. On the check-out screen, tap the time under HOURS WORKED.
- Type your real hours. Use the 24-hour clock, for example 07:30 for 7 hours 30 minutes.
- Save it. Tap OK.
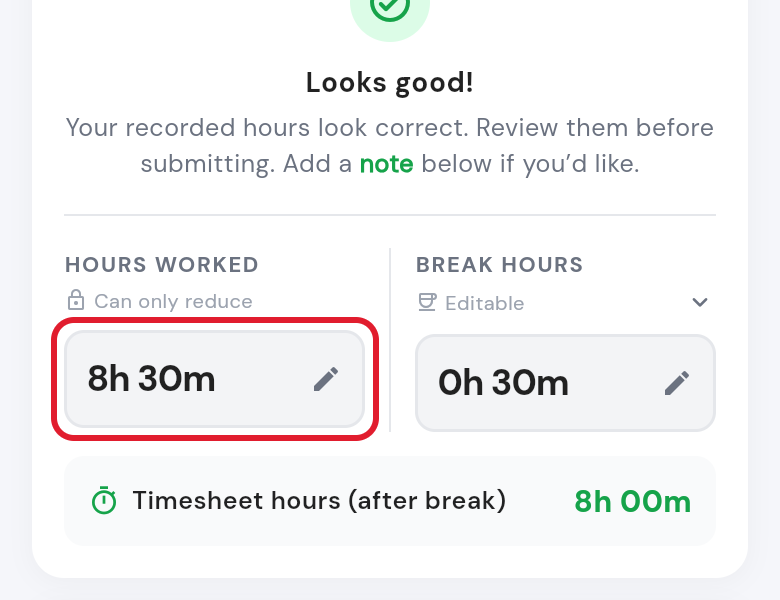
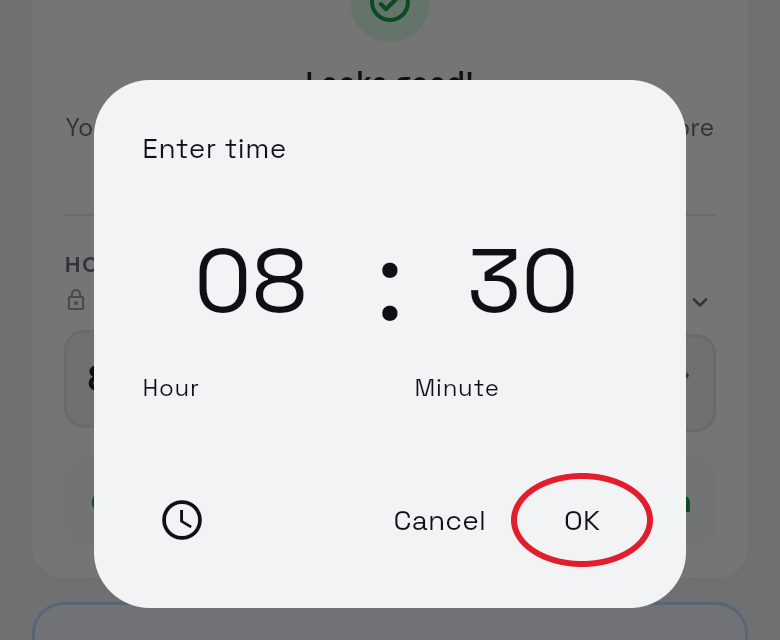
HOURS WORKED says Can only reduce. You can make it shorter, but not longer than the time since you checked in.
Change your total break time
- Tap the break time. Tap the time under BREAK HOURS.
- Type your total break. For example, 00:30 for 30 minutes.
- Save it. Tap OK.
Change one break
If you recorded breaks in the app, you can change each one.
- Open your breaks. Tap the small arrow next to BREAK HOURS to open Break Entries.
- Tap the pencil. Tap it next to the break you want to change.
- Enter the new length. In Edit Break Duration, type it and tap OK.
The total in BREAK HOURS updates by itself. Timesheet hours (after break) shows your new total, and the green button shows the new hours, for example Submit Timesheet — 7h 30m. Tap it to check out.
Review your hours after an automatic check-out
If your site uses breadcrumbing and you left the site boundary for over 30 minutes, the app checked you out and Home shows a red card: You forgot to check out Previous shift. Check that shift's hours before your next check-in.
- Tap Review & Edit Hours. It is on the card, and also shows when you next tap Checkin.
- Check the details. Make sure the Date and Project are right.
- Adjust the hours. Under ADJUST TIME, set Total Hours (and Break, if shown) to what you worked.
- Confirm your hours. Tap Yes, I confirm that I worked the given hours.
- Submit the timesheet. Tap Submit Timesheet & Continue.
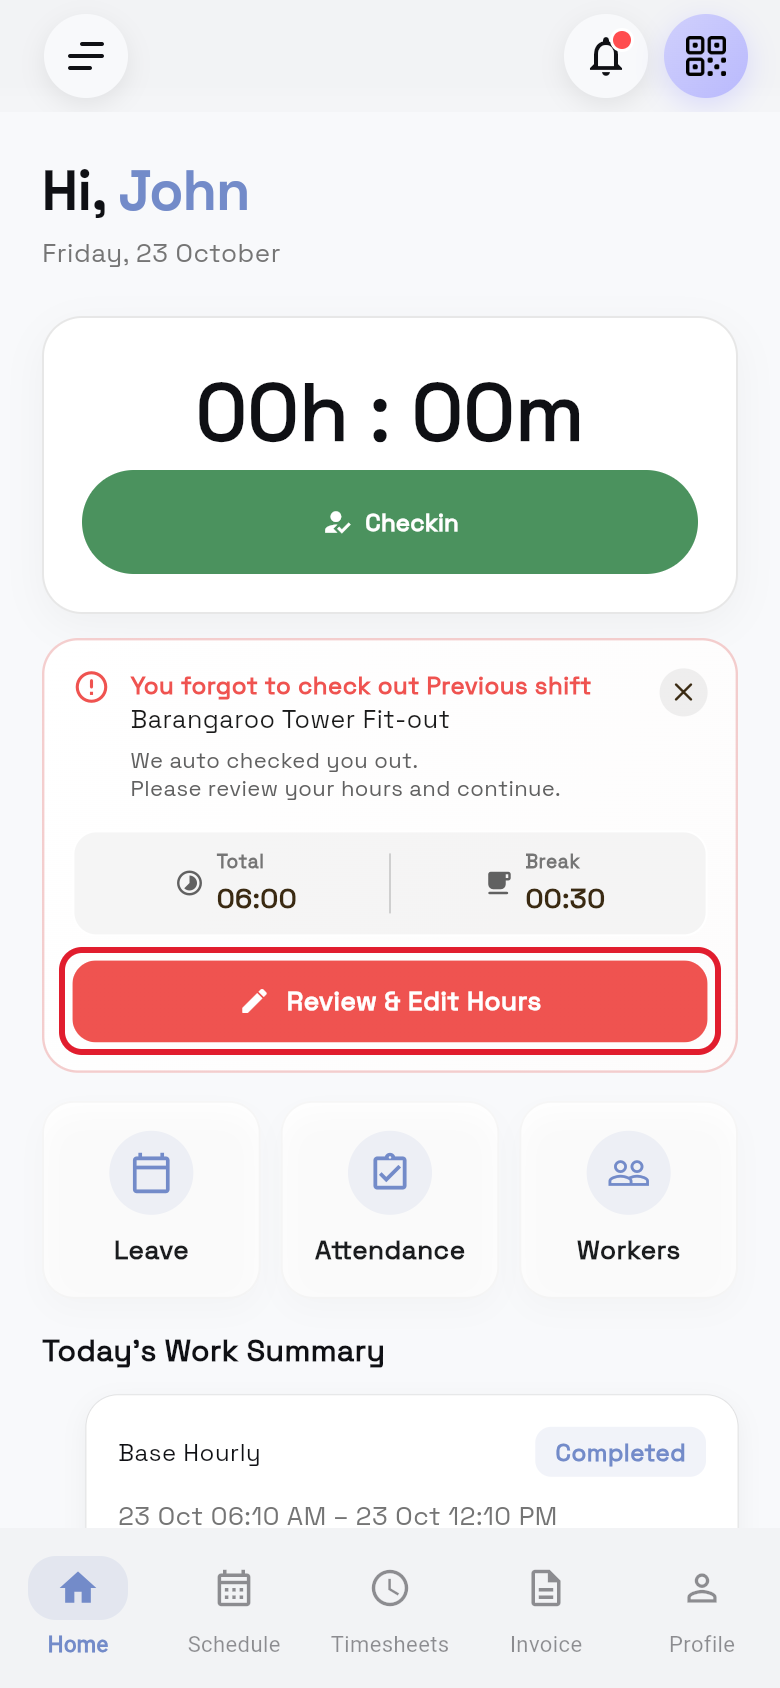
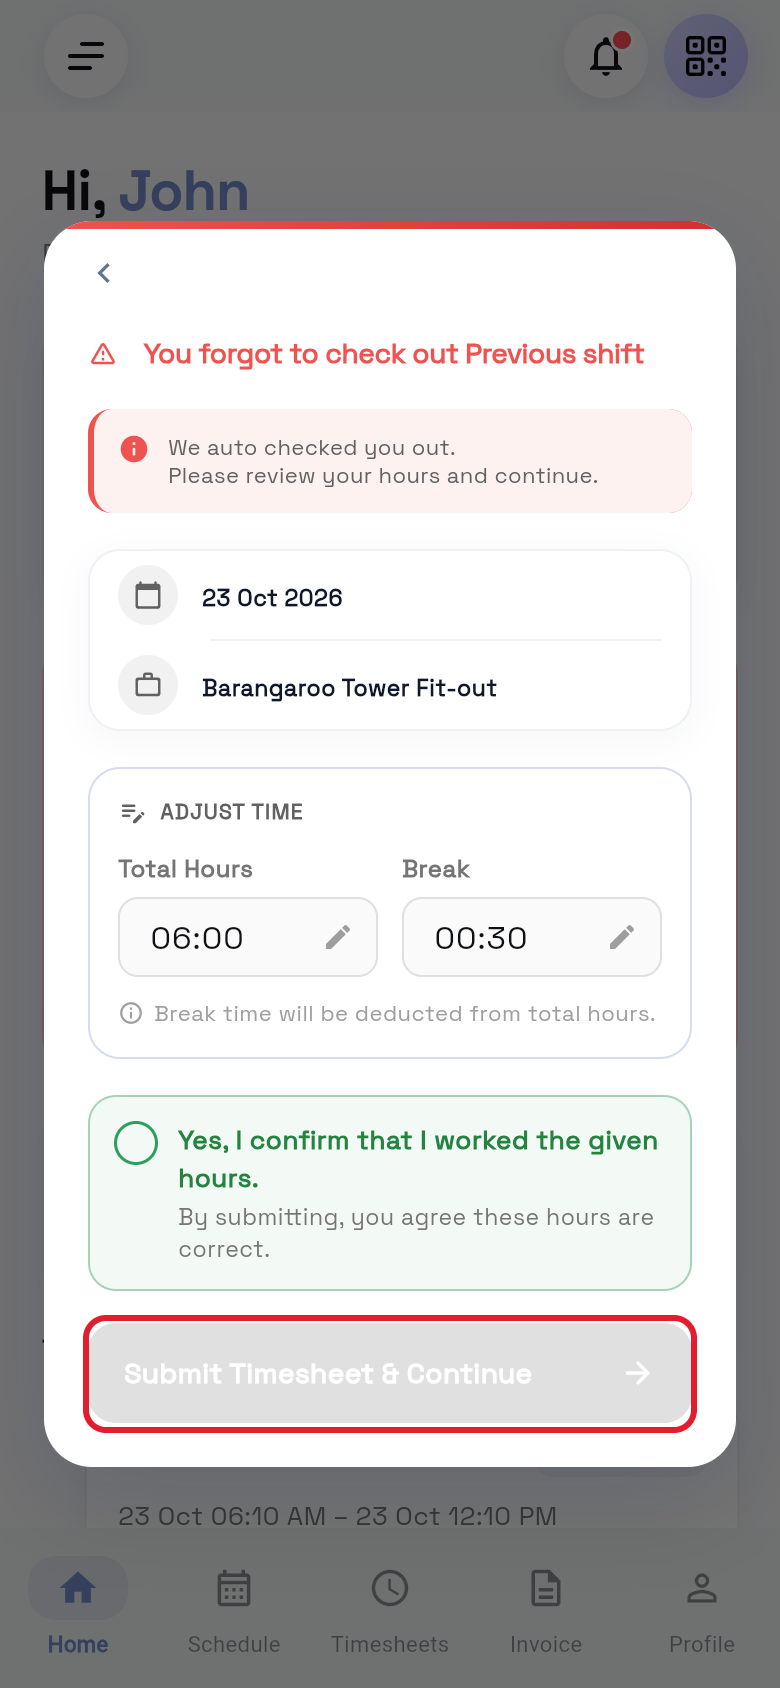
You see Record updated successfully. If you opened the box by tapping Checkin, your new check-in carries on. To hide the card for now, tap the X in its top-right corner.
Add a timesheet manually
Add a timesheet by hand, for example if you forgot to check in. You need the project, the date, and your start and end times.
- Open Timesheets. Tap Timesheets in the bottom bar.
- Tap the + button. It is in the bottom-right corner and opens Create Timesheet.
- Choose the project. Tap Select Project and pick one.
- Choose the workers. If you see Users, tap Select Users and tick each worker.
- Choose the pay item. Tap Select Pay Item, for example ordinary hours.
- Pick the date. Tap Select Date* and pick the day you worked.
- Enter your times. Enter Start Time* and End Time* (Next Day shows after midnight).
- Check the total. Total Work (HH:MM) is worked out; typing it changes the end time.
- Add your break. If you see Break (HH:MM), enter your total break, for example 00:30.
- Add a note. If you want, type a note in Notes.
- Add more timesheets. Tap Add for another card, or the red bin to remove one.
- Save the timesheets. Tap Create.
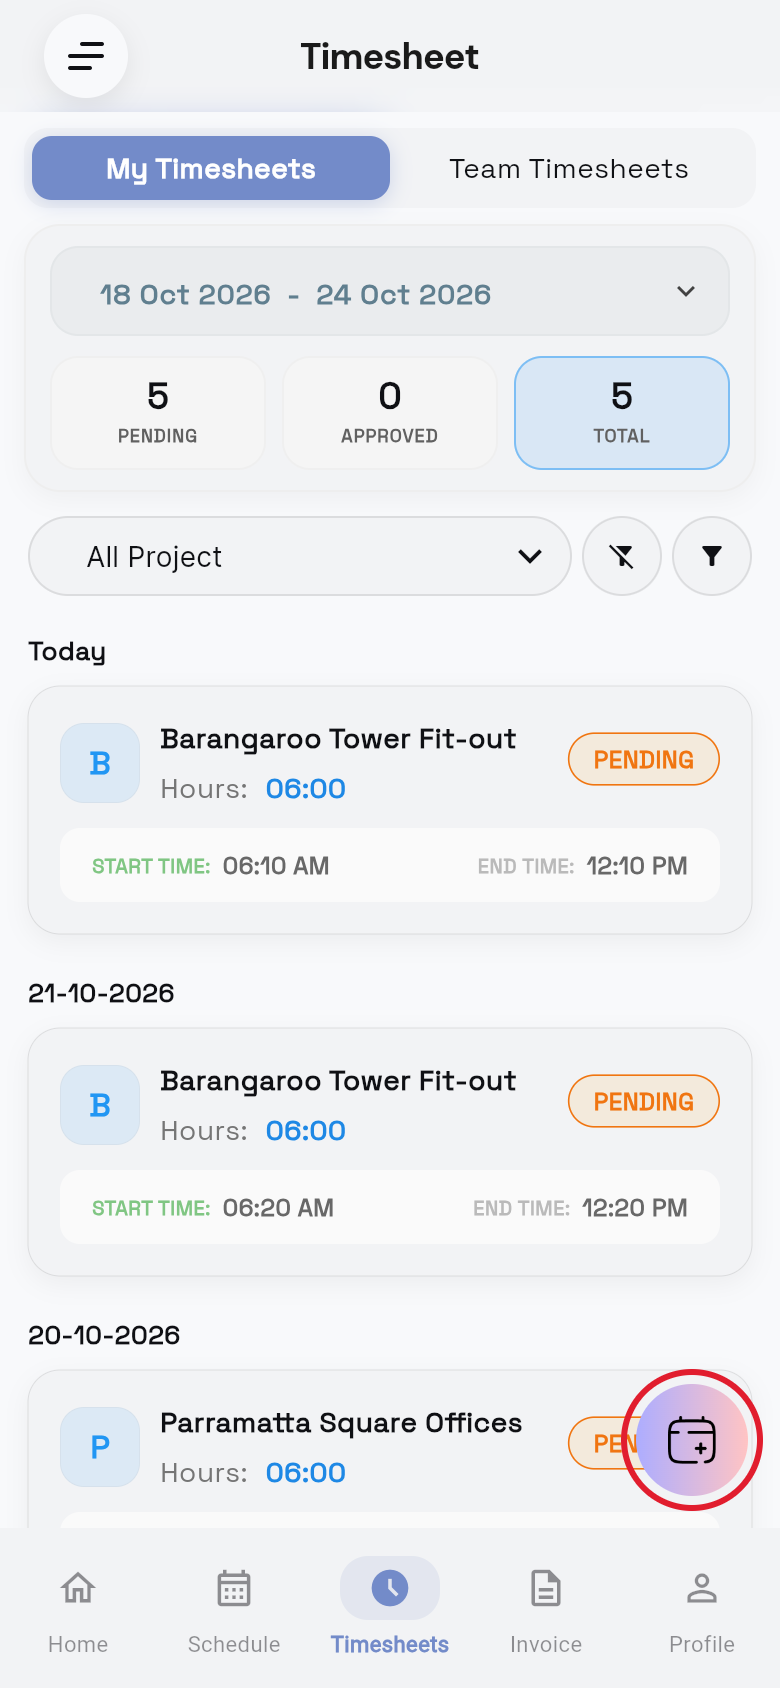
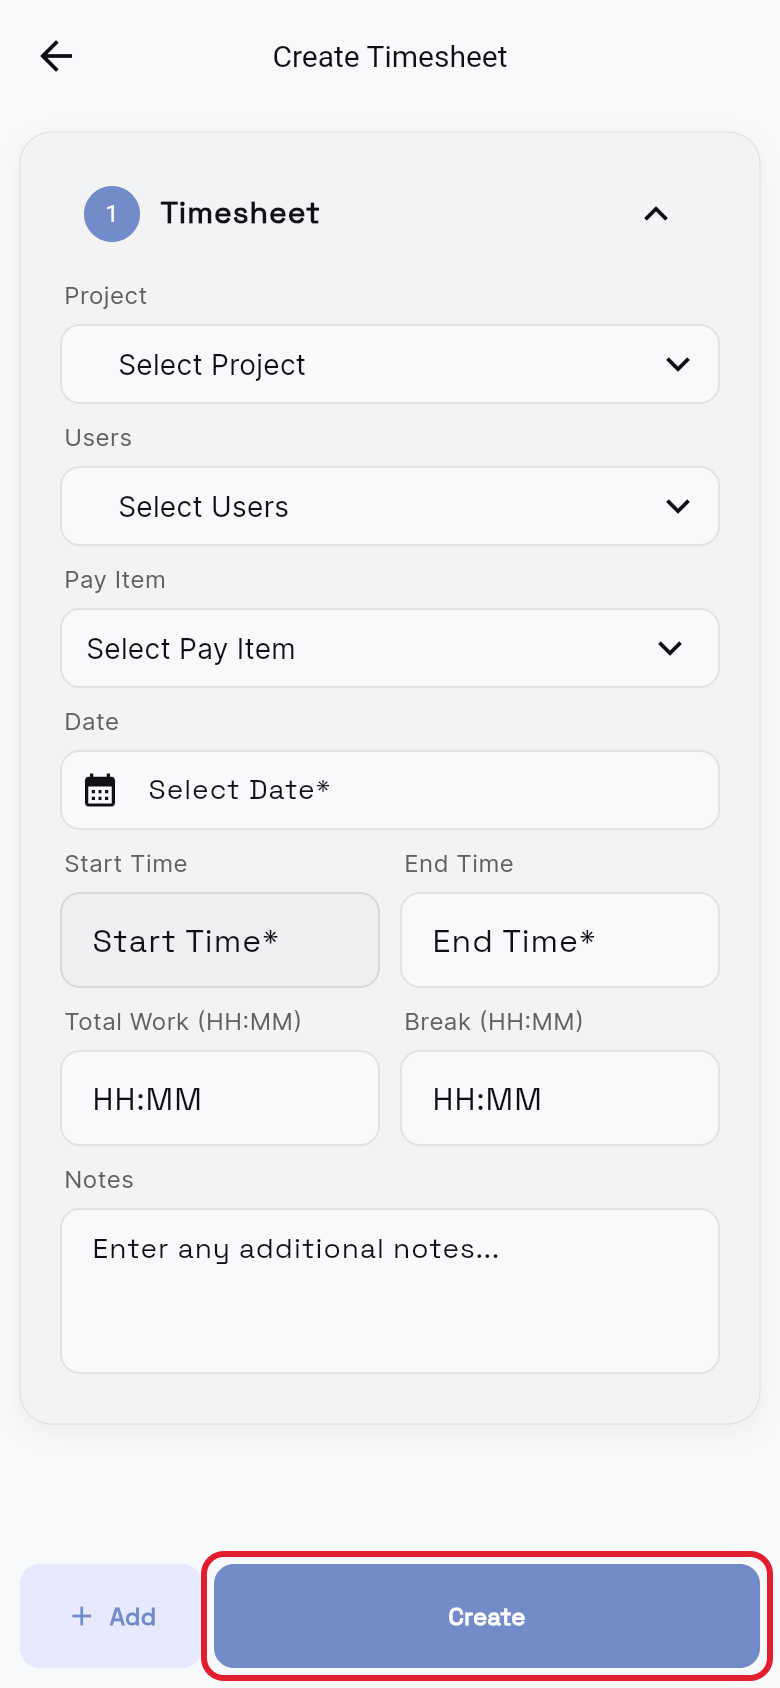
A green tick shows the timesheets that were created, and a red cross shows any that failed, with the reason. The new timesheets show as PENDING in Timesheets.
Questions and answers
Why isn't my timesheet showing?
Check the dates include the day you worked, clear any filters (tap the funnel with a line through it), and check your organisation. Timesheets of 15 minutes or less show Timesheet too short and are deleted at check-out.
Why can't I change a timesheet I already sent?
Workers can't change a sent timesheet, even a DECLINED one, so change your hours when you check out. If a sent timesheet is wrong, ask your site manager to fix it.
I left the site but wasn't checked out automatically. Why?
Location isn't set to Always, or battery saving closed the app. See Fix check-in problems.